This description takes you thru the steps needed to get your Microsoft 365 tenant ready for LoopMeeting. Please follow the steps carefully and do not skip any of the steps described unless they are marked as optional.
Traditionally loopMeeting (LM) is using the EWS API with basic authentication for integration with Exchange 2010, 2013, 2016 and 2019. Using https (TLS1.2) protocol. However, for Microsoft 365 it is announced that they will not continue developing features for EWS API and retire support for basic authentication. Their focus going forward on MS365 is their new MSgraph API and OAuth2 authentication.
Microsoft will retire basic authentication for EWS in Office 365 sometime in second half of 2021. However, if you set up a new 365 tenant basic authentication will be disabled by default and enforce you to use OAuth2.
With ths guide you will enable your environment to use both MSgraph and EWS with Oauth2 authentication
2. Prerequisites
Register a management account at https://loopmeeting.no/registration.php You will need to have your O365 administrator to register the LoopMeeting application in AzureAD and add the service account as a user to the application.
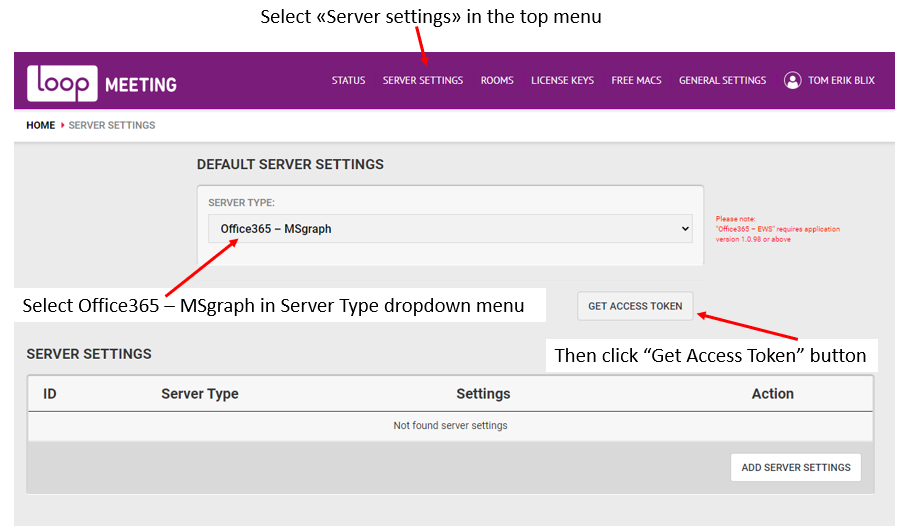
3. Register LoopMeeting application in Azure AD
For LoopMeeting to be able to work it needs to be registered as an enterprise application in Azure AD. (This only need to be done once by the Global administrator) The easiest way to do so is thru the Central Configuration console. Log on to the central configuration console https://loopmeeting.no/admin/ If you do not have an account, please create an account for your company.
Open your browser in “Inkognito” mode (cntr+shift+n in chrome) – this to avoid using any cached O365 accounts when authenticating the Application in Azure AD
Important: After clicking the “Get Access Token” you will be asked for credentials. You MUST log in as a MS365 Global administrator (or equal) to get the Application registered and authorized in your Azure AD.
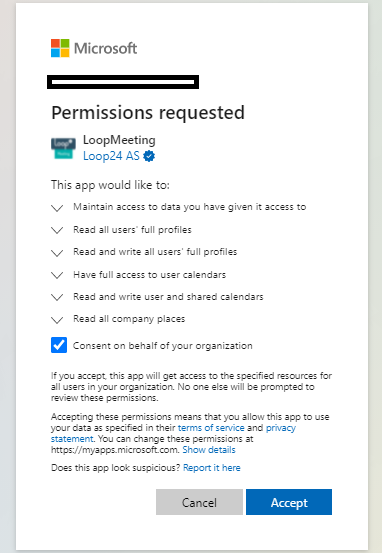
Check the checkbox and accept the application registration.
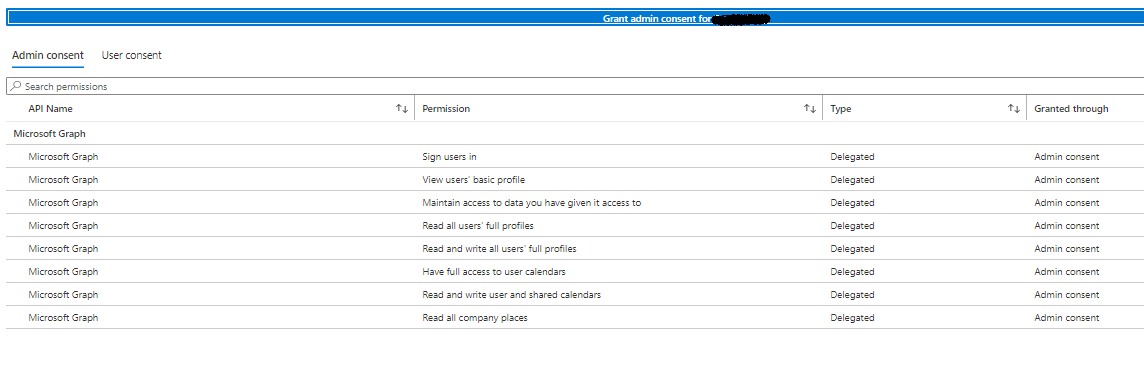
For your information: This is the permissions requested for the LoopMeeting application
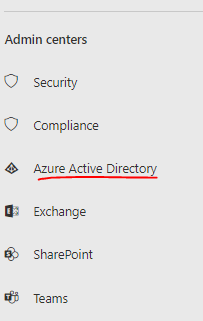
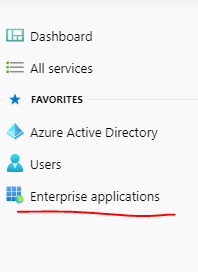
Now you need to add the service account as a user for LoopMeeting Enterprise Application. Log into the Office365 admin console with a O365 administrator account. https://admin.microsoft.com/AdminPortal/Home In the left side menu – click “Show All”, then select “Azure Active Directory”
A new console will now open, select «Enterprise Applications» in the left menu.
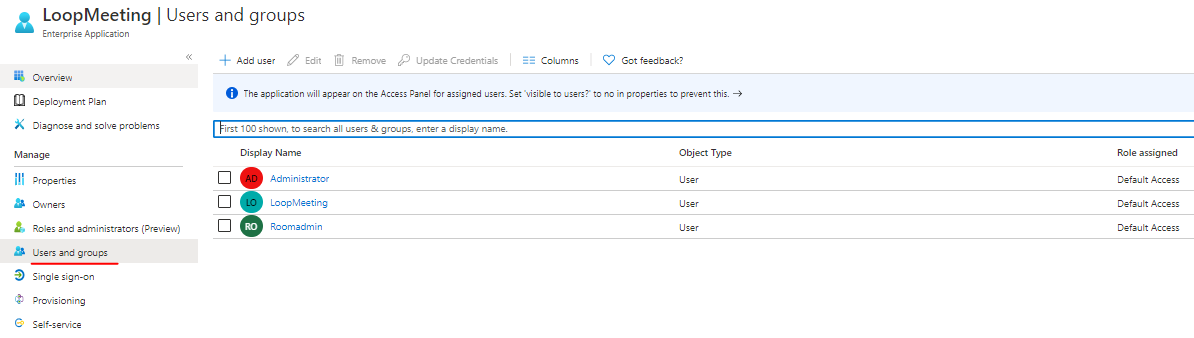
Select «LoopMeeting» application in the list of applications
– Select “Users and groups” in the left menu – Add User – Select the service account(s) to be used with LoopMeeting and assign.
4. Configure LoopMeeting central configuration
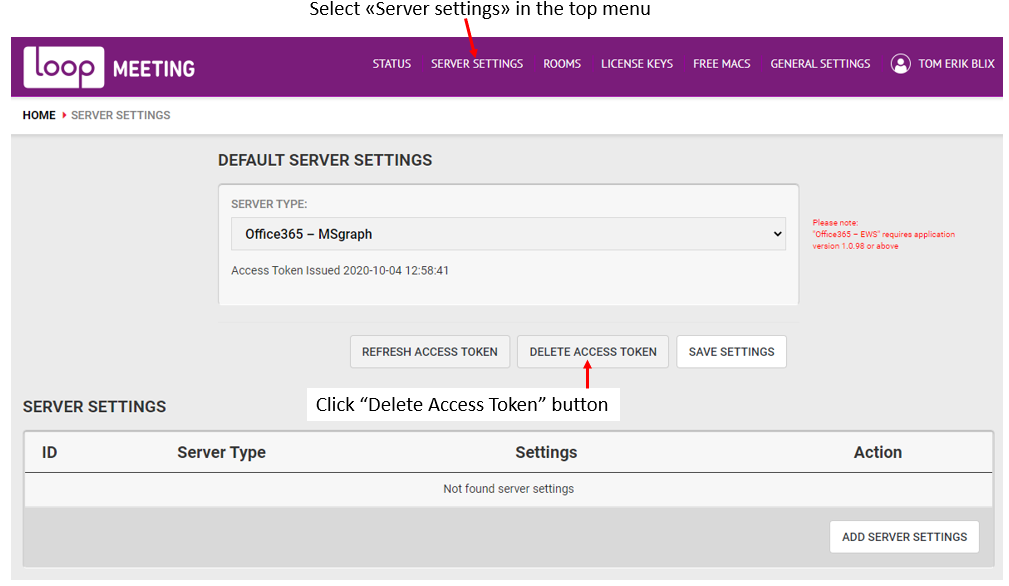
After finalizing the steps in section 3 (This only need to be done once) you are ready to configure LoopMeeting central Config settings. Make sure you have closed all Microsoft O365 Web pages / logged out of the O365 Administration console.
Log in to LoopMeeting Central Configuration console with the previous created account. Open it in a inkognito browser window (cntrl+shift+n in chrome) this to make sure you do not use any cached MS365 accounts as roomadmin when you request token later in this process. https://loopmeeting.no/admin/
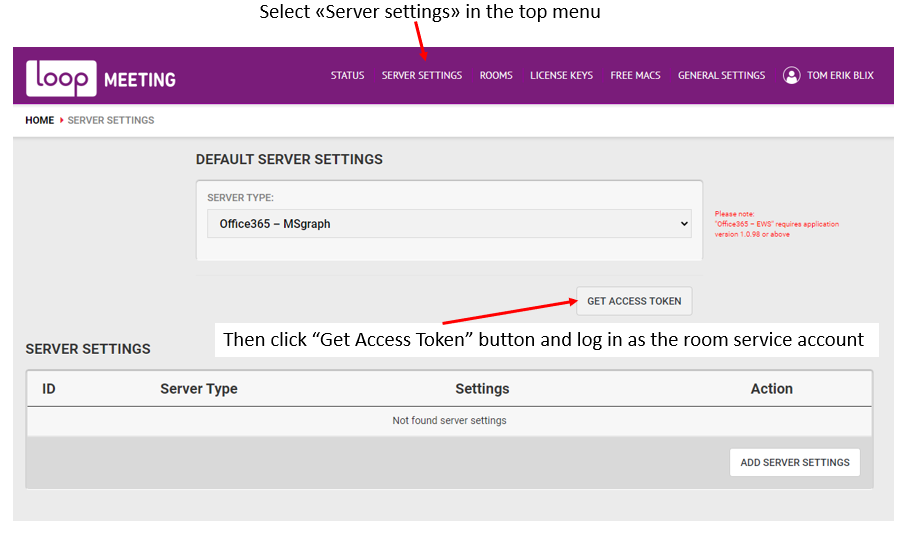
After login is OK with the roomadmin service account, you will get an access token. Then press the button “Save Settings” Roomlists and rooms in your MS365 account will now be added to the central configuration console.
IMPORTANT: now the next stem will be to configure the Central Configuration console and deploy the panels. See this guide: “How to configure central admin console”
If you get any errors or problems loading the rooms from your environment, please try to user Server type “O365 – EWS”