Main principles of the interface and functionality in the screen editor and Media Bank. This guide demonstrates, as an example, how to place images on a screen.
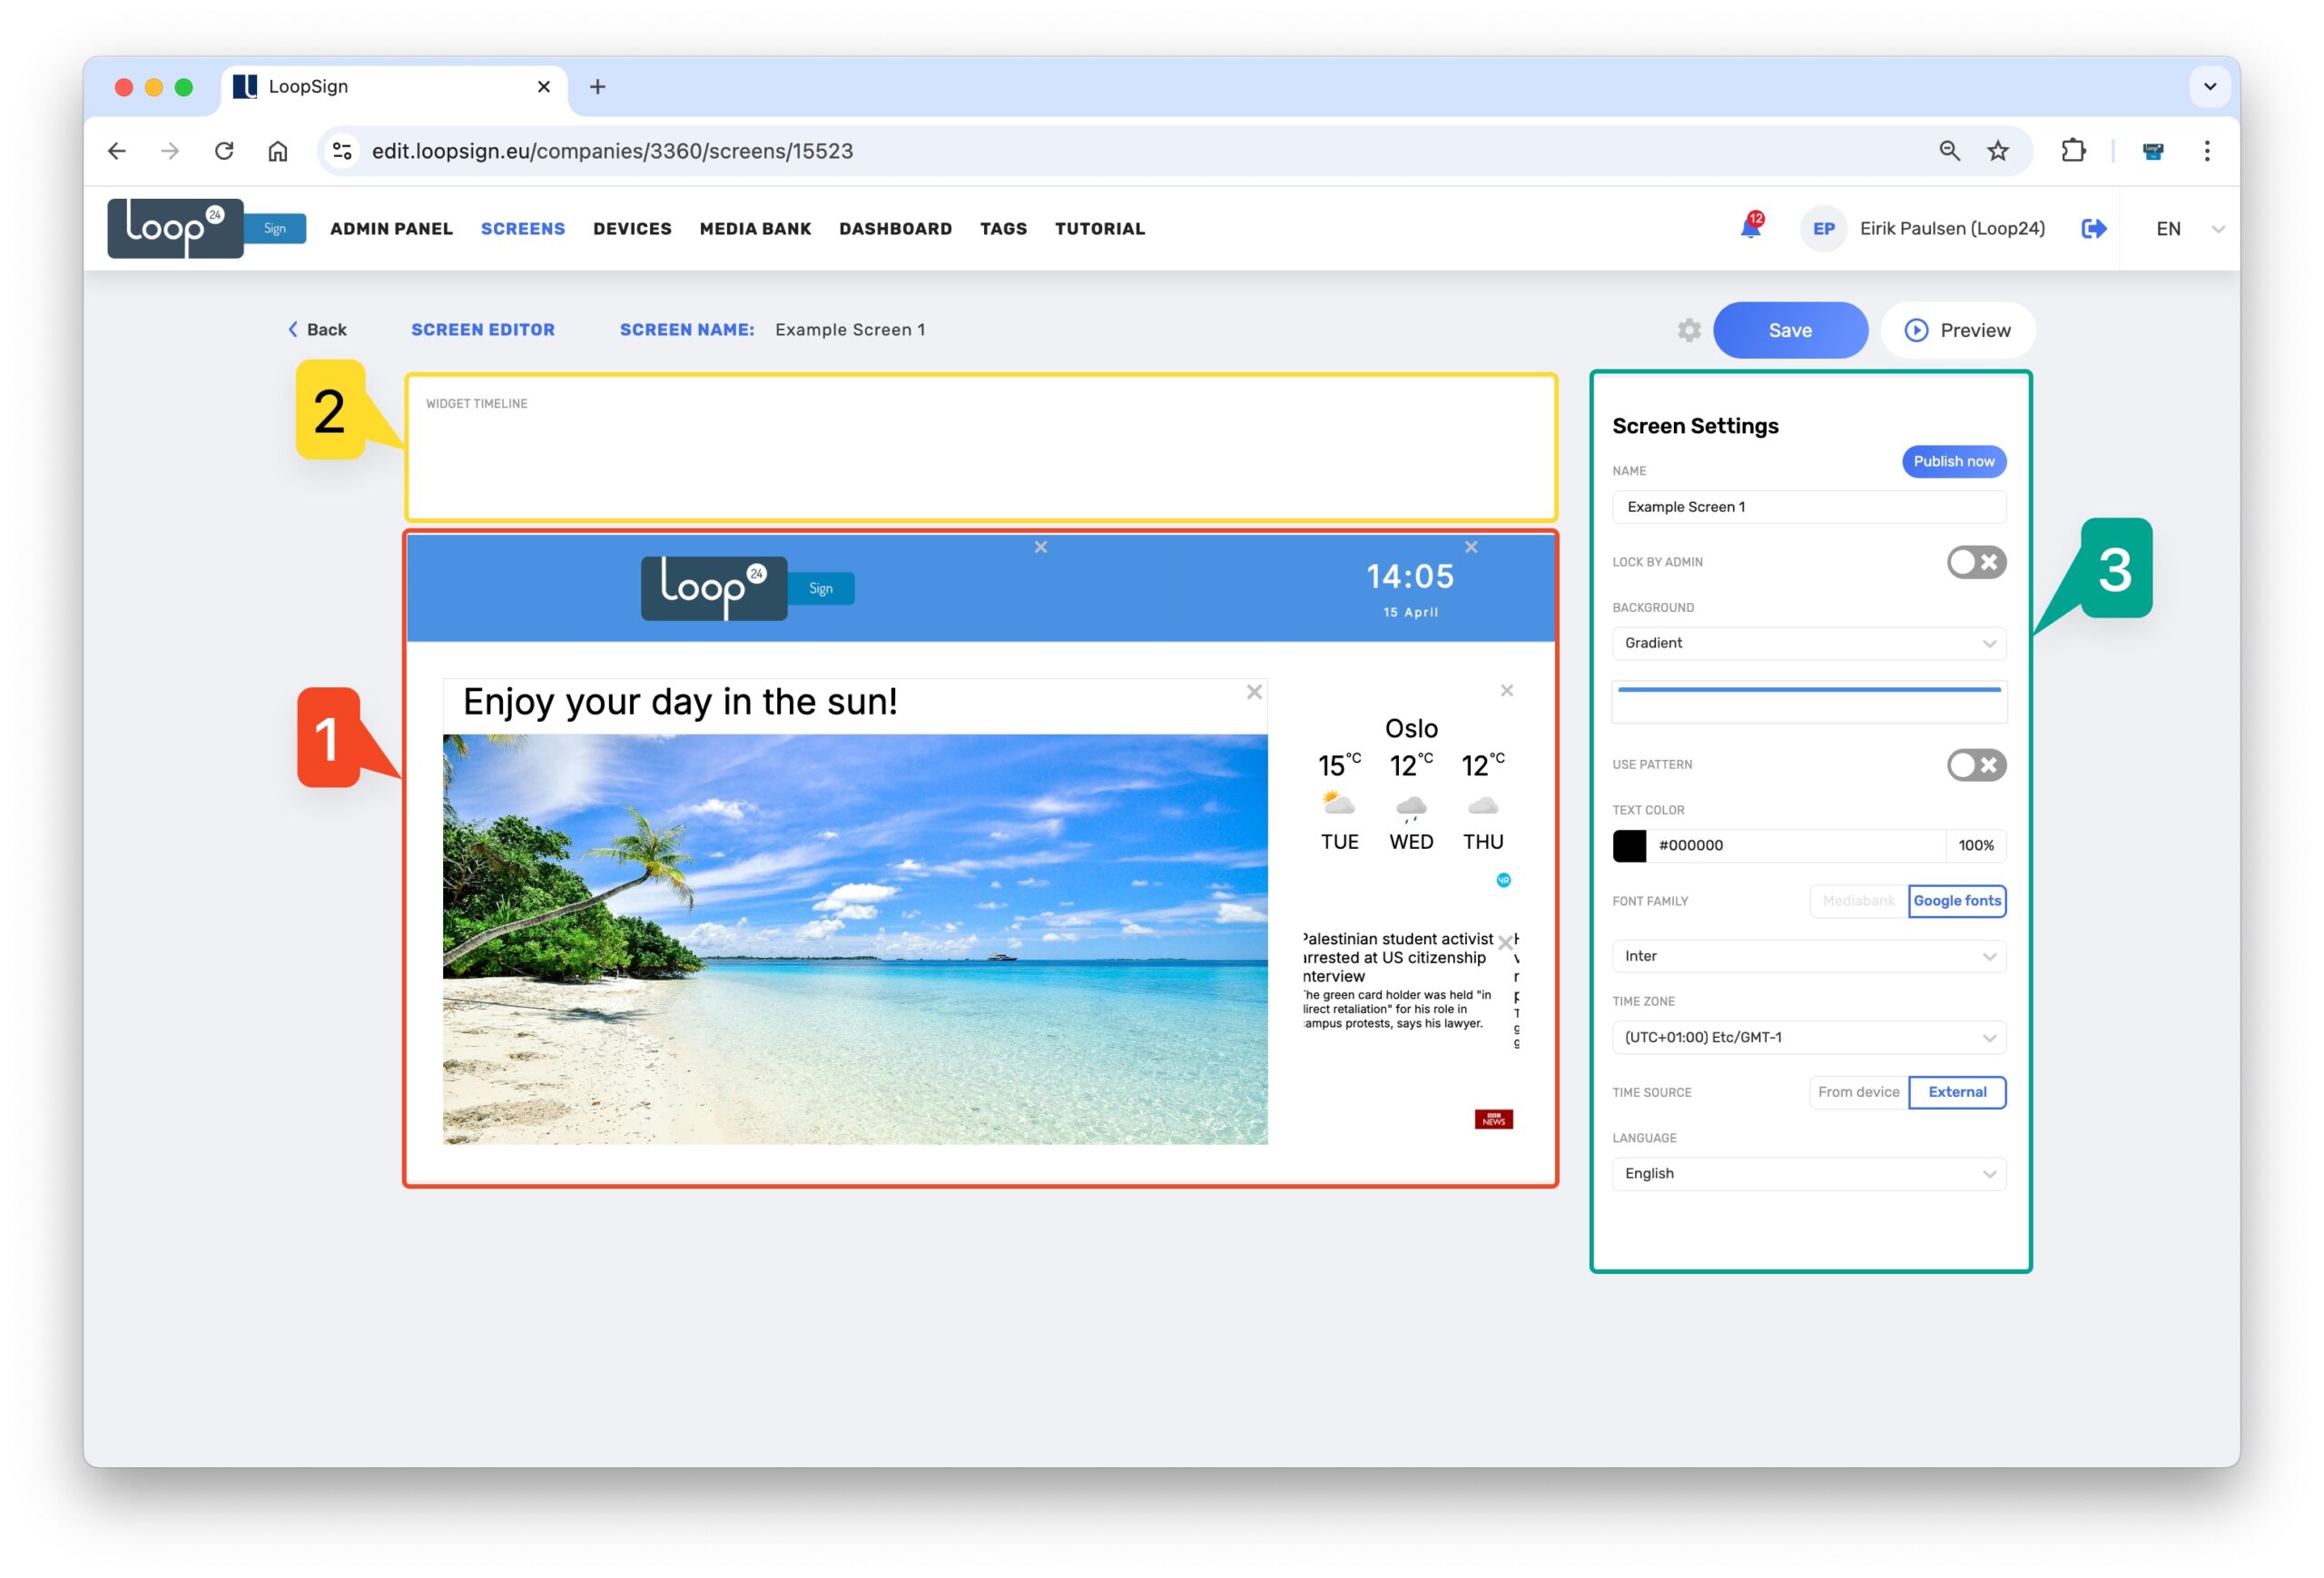
1 When you open the screen editor for a screen, there are three main parts of the interface to interact with:
The screen itself.
The timeline for widgets above the screen. Initially, nothing is displayed here.
Settings to the right of the screen. Initially, the general settings for the screen are displayed here.
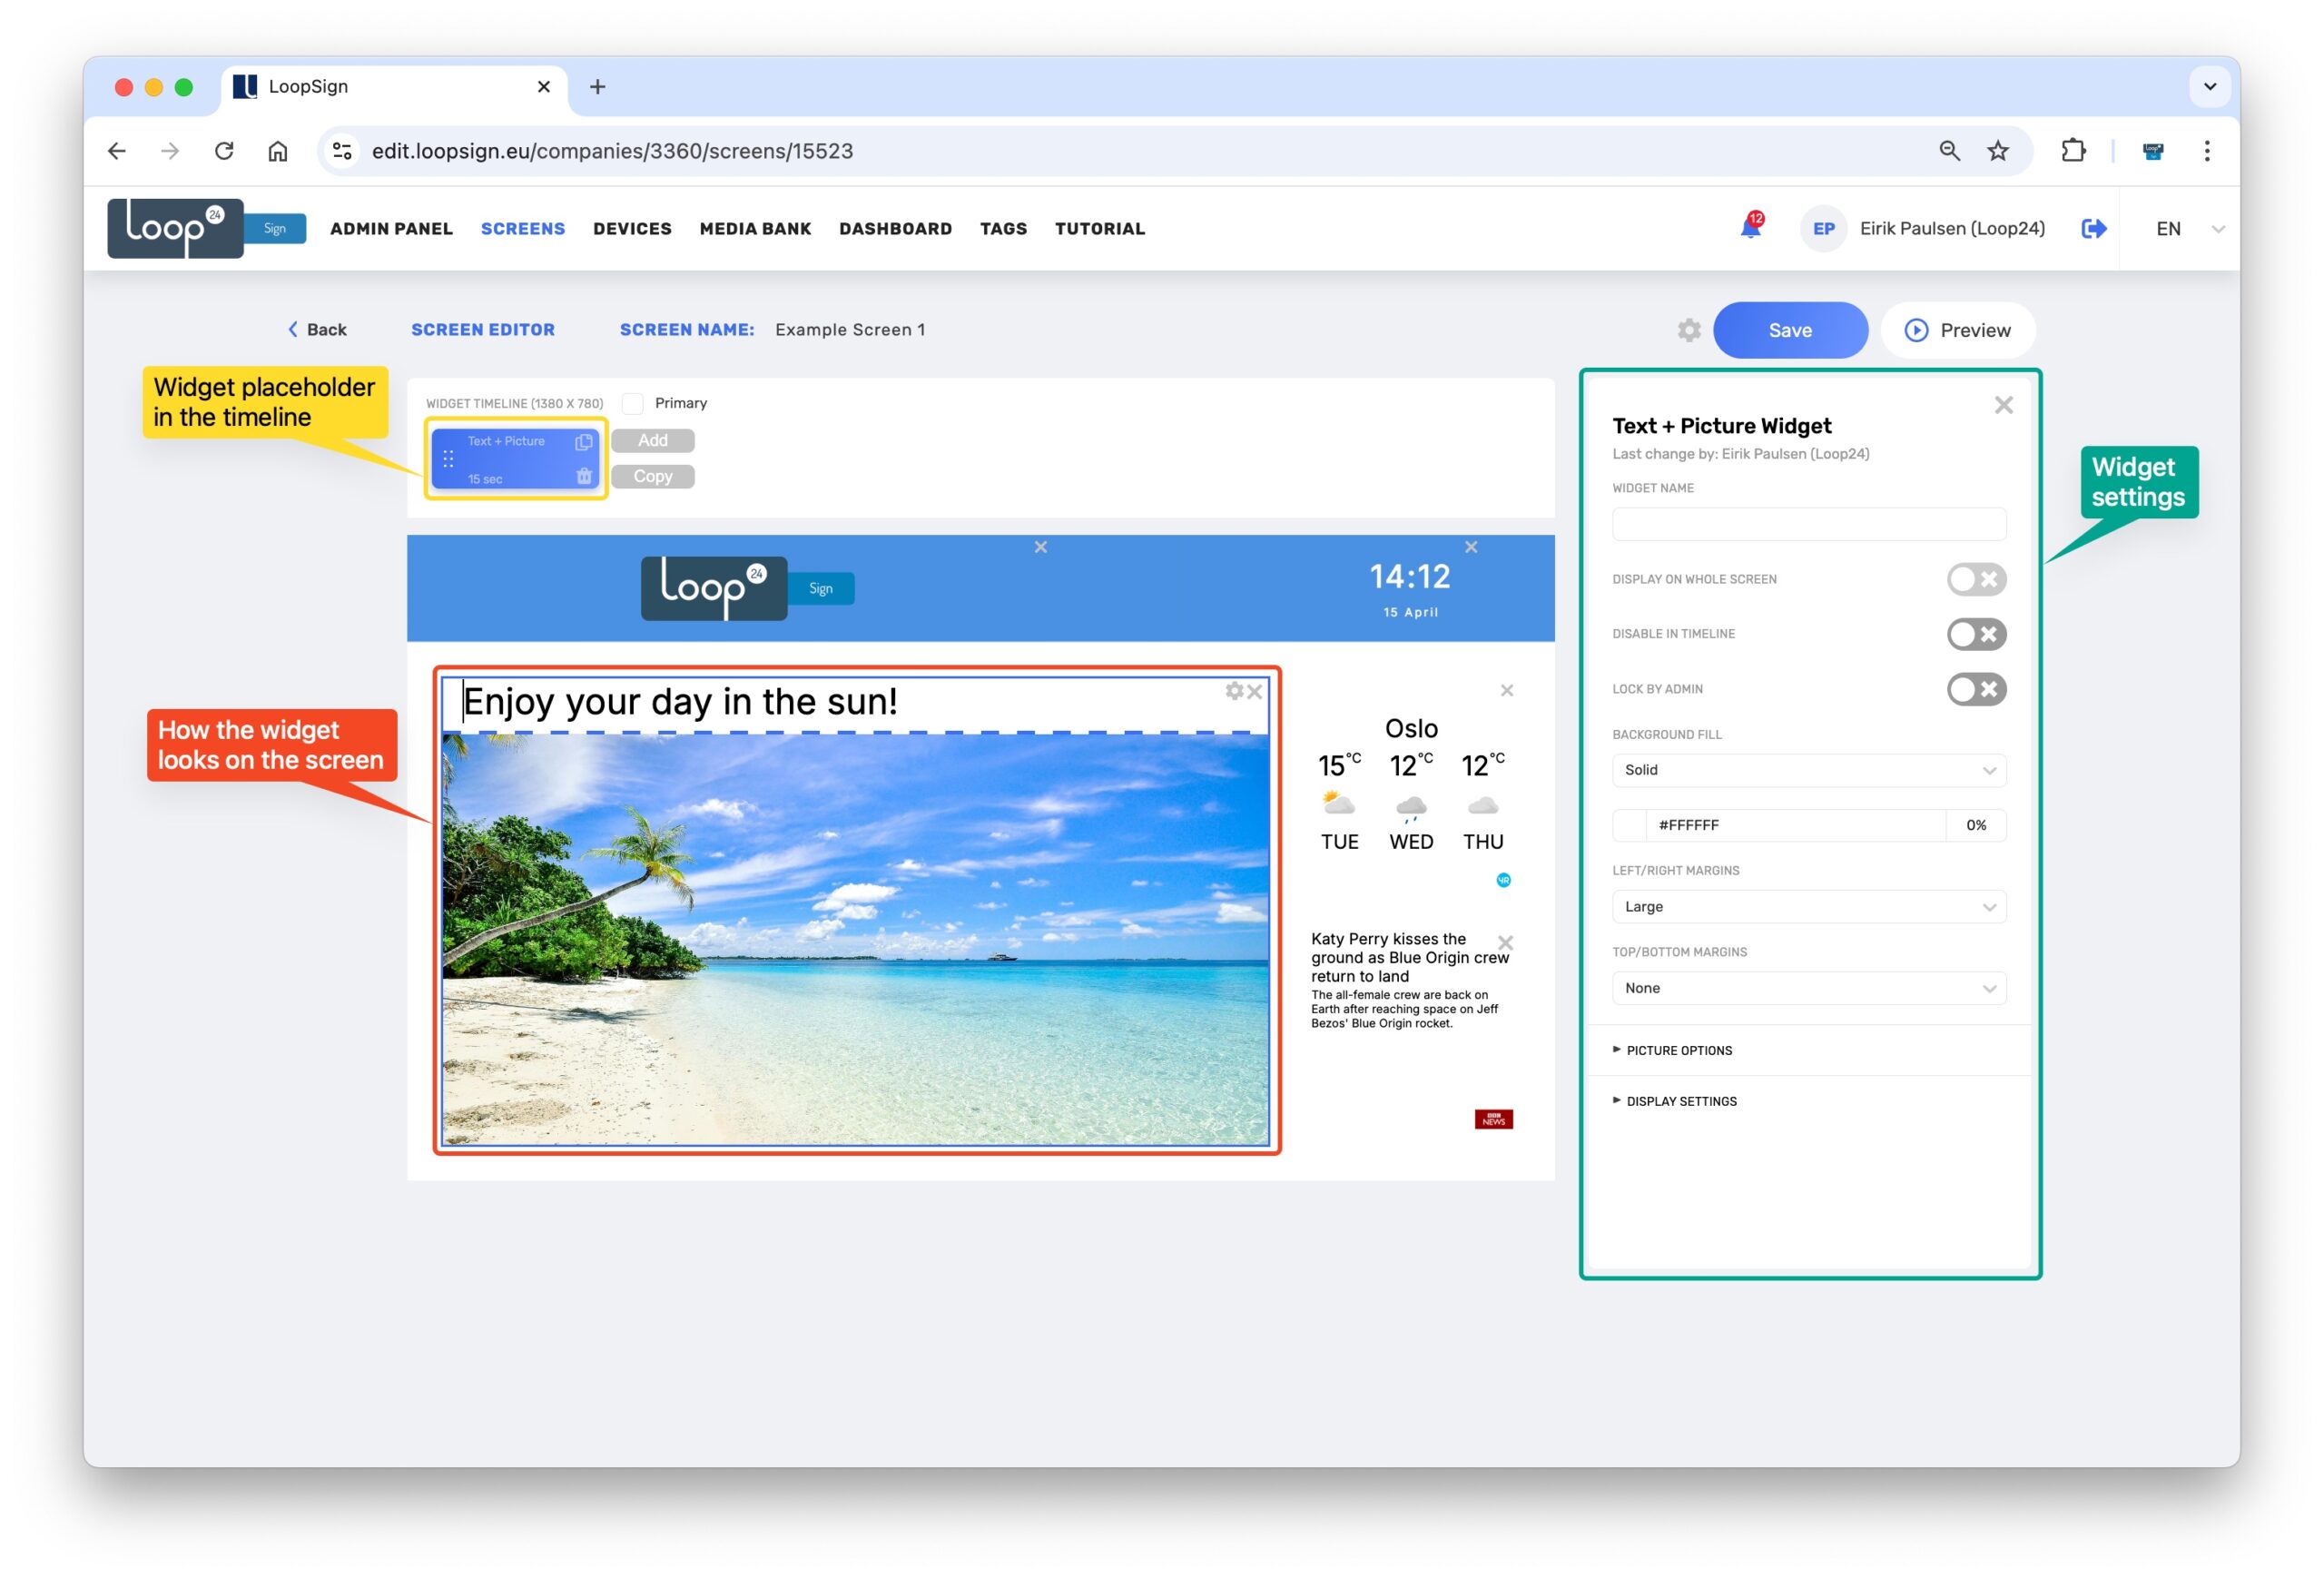
2 By clicking on a defined area of the screen, the area will be highlighted with a blue border, and you will be given the option to manage the content within that area. The timeline above the screen now shows the “widgets” (content modules) that are defined to be displayed in the marked screen area, and to the right, the settings for the selected widget are now displayed.
3 To add a new widget to the screen area, click “Add” all the way to the right in the timeline. By selecting “Gallery” from the widget menu that appears, a new widget will appear in the timeline, allowing us to add one or more images to the screen display.
4
The new Gallery widget is currently without images, so we need to click on “Choose image…” in the widget’s settings on the right. This opens the Media Bank. If necessary, create a new folder in the Media Bank where you can add images. Click on the folder where you want to store the new images, then click “Upload.”
To upload images from your PC, click “Choose files to upload.”
By selecting Pixabay or Pexels, you can search and find stock images that can be used on your info screen(s). The image results from Pixabay and Pexels are licensed for free use on your info screen.
Click and select the image(s) you want to add to the new gallery widget on your screen and click “Save” at the end.
TipBy selecting “Media Bank folder” as the source in the gallery widget settings, instead of “Media Bank images,” the gallery widget will automatically be filled with all the images in the folder you define in the Media Bank. This allows you to manage which images are displayed on the screen later, simply by adding or removing images from the relevant folder.
This feature works very well in combination with uploading images to the Media Bank from your mobile phone, allowing you to quickly and easily update your screens with photos you’ve taken with your phone. You can see a brief, separate guide for this here.
5
You have now added a new gallery widget and selected images for it. You can now, if desired, modify the default settings for the widget. For example, you can define duration and scheduling under “Display settings,” and you can cross-publish the widget to other screens. (See the separate guide for details here.)
Remember to click “Save” when you’re done. The new gallery widget will then be published to the screen and displayed alongside any existing content, at the display rate set. It can take up to 15 minutes from when you click “Save” for the changes to manifest on the physical screen.