
LoopVisit MS365 SCIM
Here you will find information on how to configure MS365 / Entra ID SCIM 2.0 integration in LoopVisit
Back

You can provision users from MS365 / Entra ID thru
the standardized SCIM 2.0 protocol
To configure SCIM 2.0 user provisioning you need to follow the steps below.
There are quite a few steps, but it is fairly easy to configure.
Please note that only users with configured mobile phone number will be provisioned.
Create a access token from LoopVisit
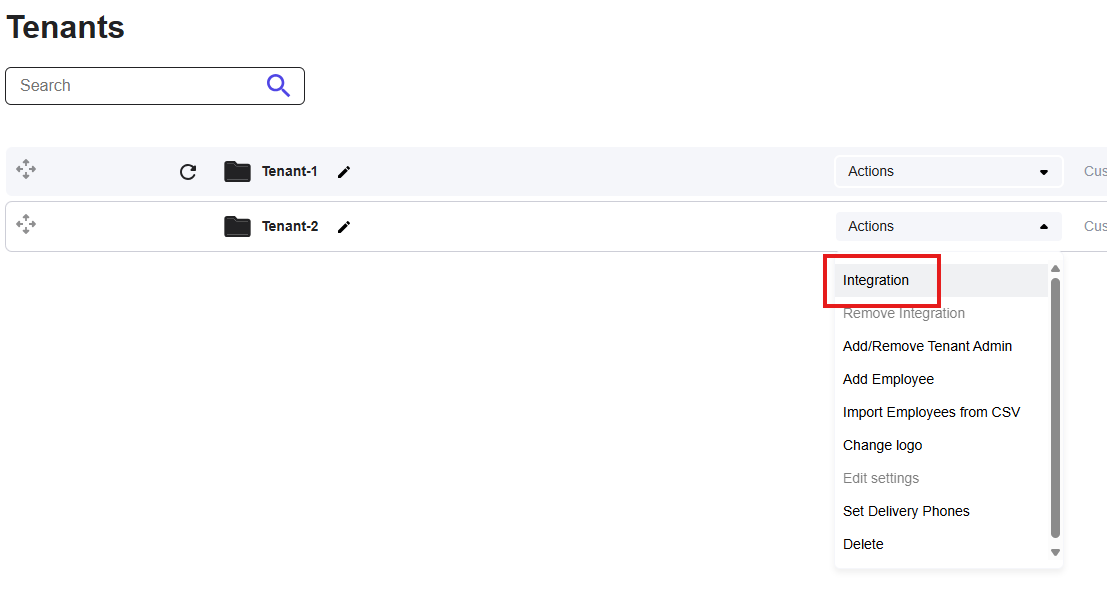
In LoopVisit console, select “Tenants” and “Integration” in the “Actions” menu.
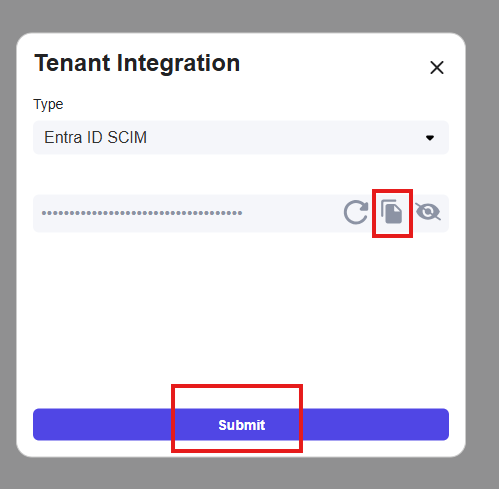
Under Integration, select “Entra ID SCIM”
Copy the access token (Secret) to your text editor (You will need it later)
Then select “Submit”
Create Enterprise App in Entra ID
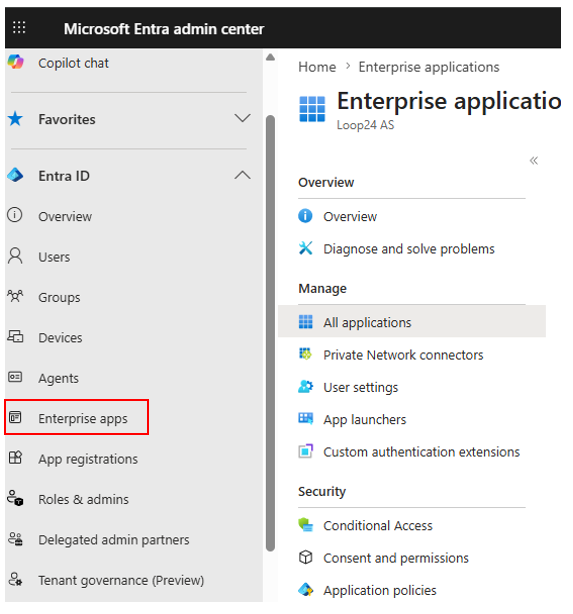
Open Entra ID console: https://entra.microsoft.com/#home
Select “Enterprise App” in the left hand side menu.
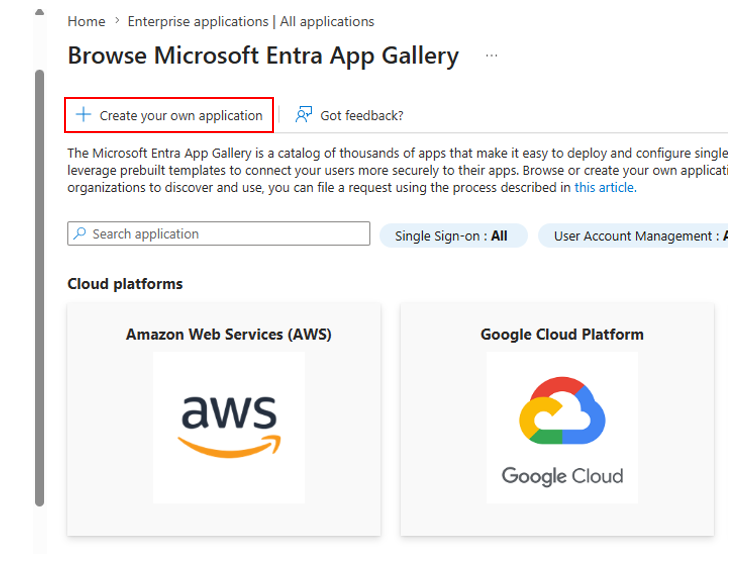
Create a new Enterprise app.
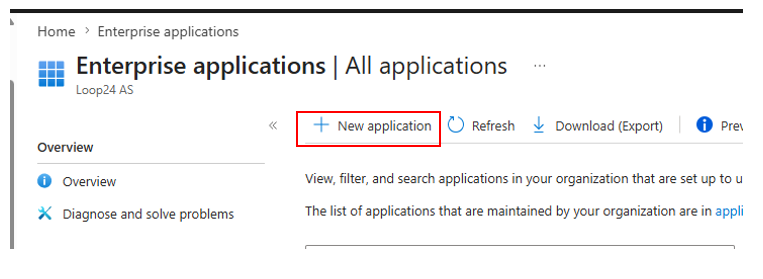
Select “Create your own application”
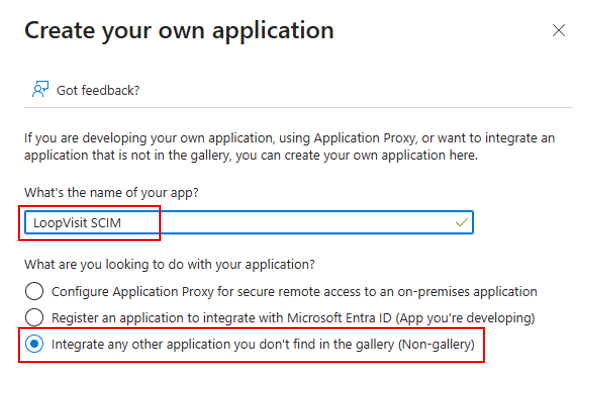
Give the application a name, and select “Integrate any other application you don’t find in the gallery”
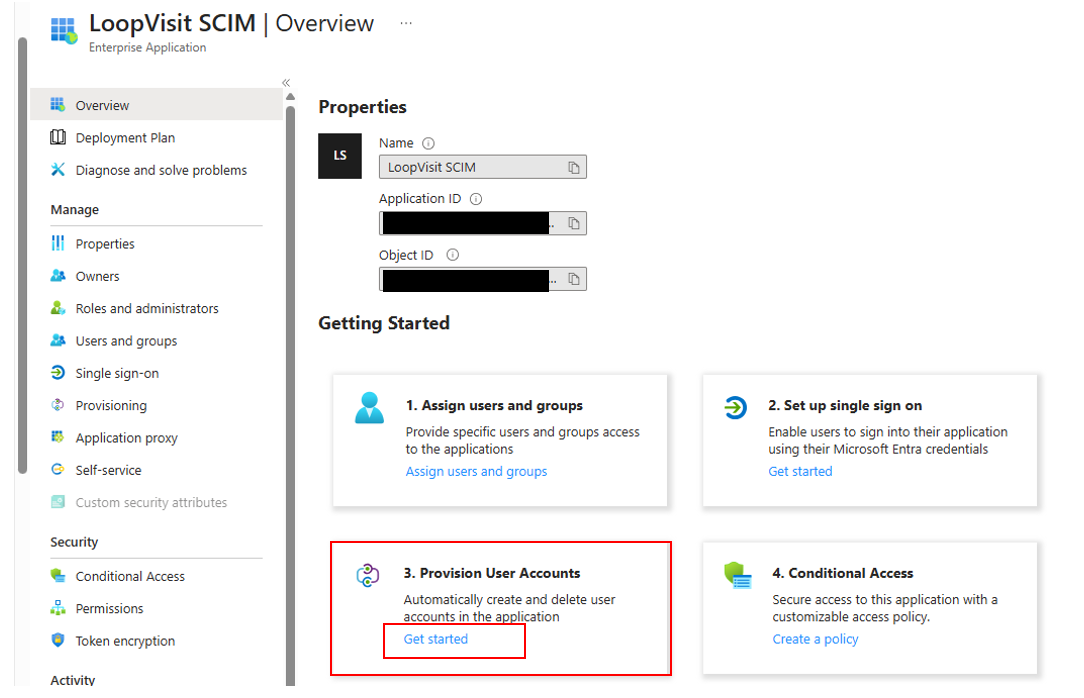
In the overview, select “Get started” in the “Provision User Accounts” field
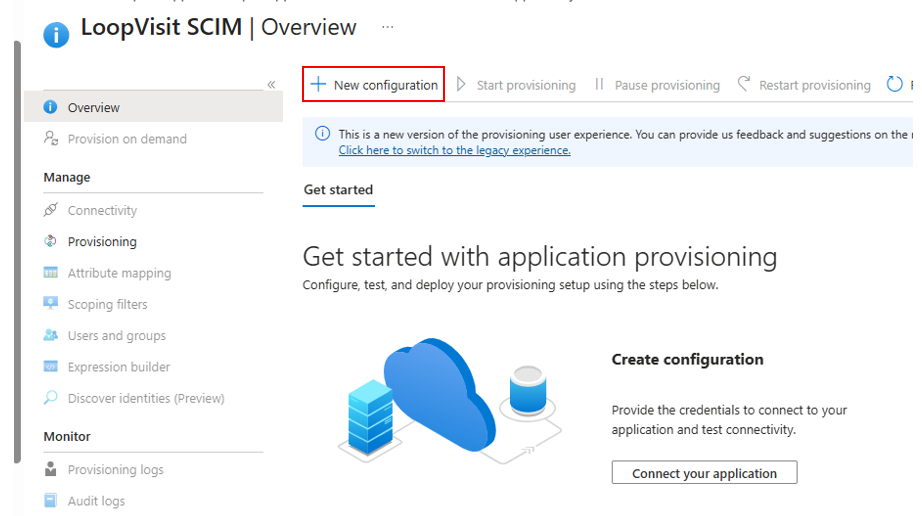
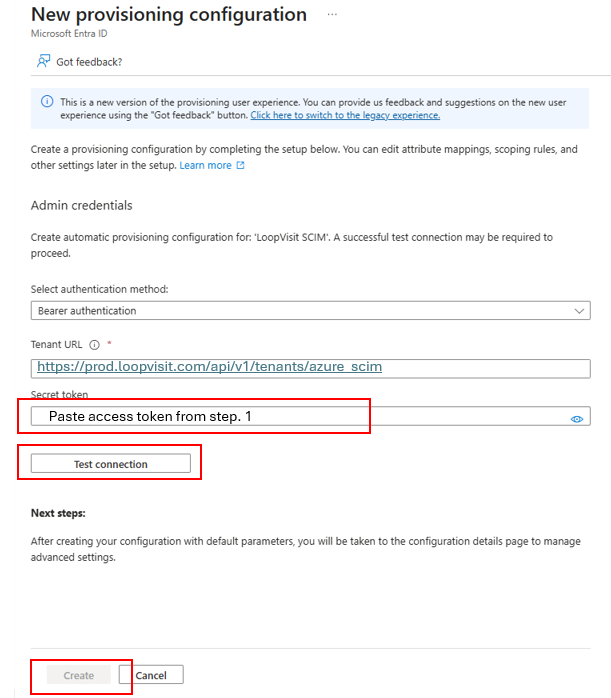
Select “New Configuration”
Configure Tenant URL: https://prod.loopvisit.com/api/v1/tenants/azure_scim
Add secret token from LoopVisit console. (Ref. step. 1)
Test the connection, if connection is OK, then select “Create”
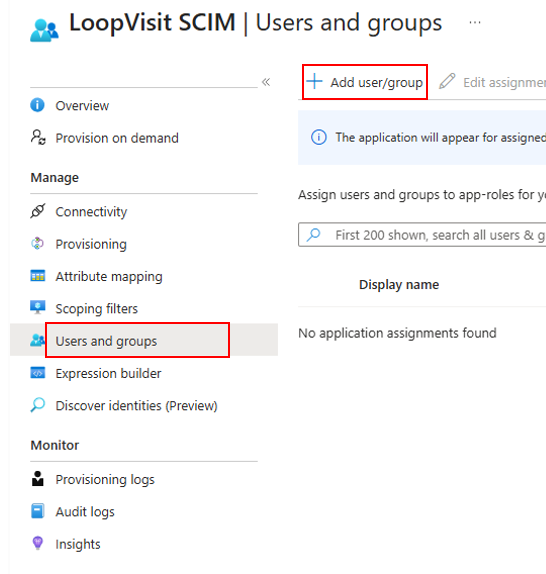
Add user group(s) that should be provisioned to LoopVisit
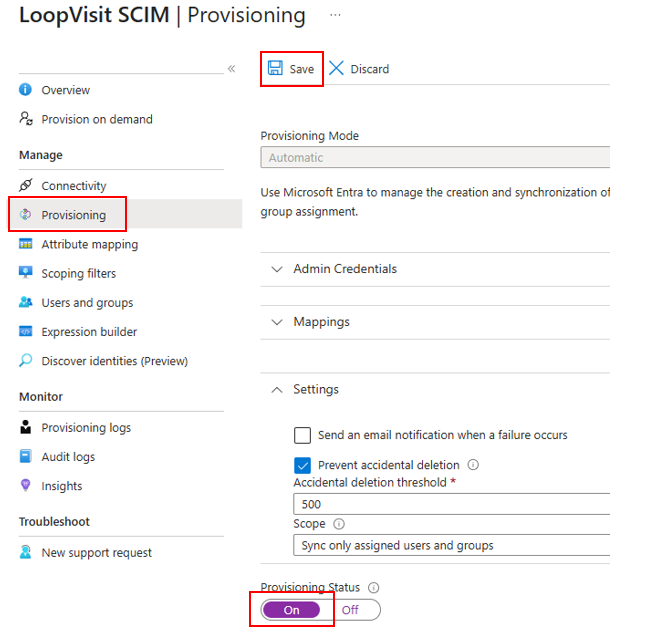
Select “Provisioning” Set provisioning to “on” and Save.
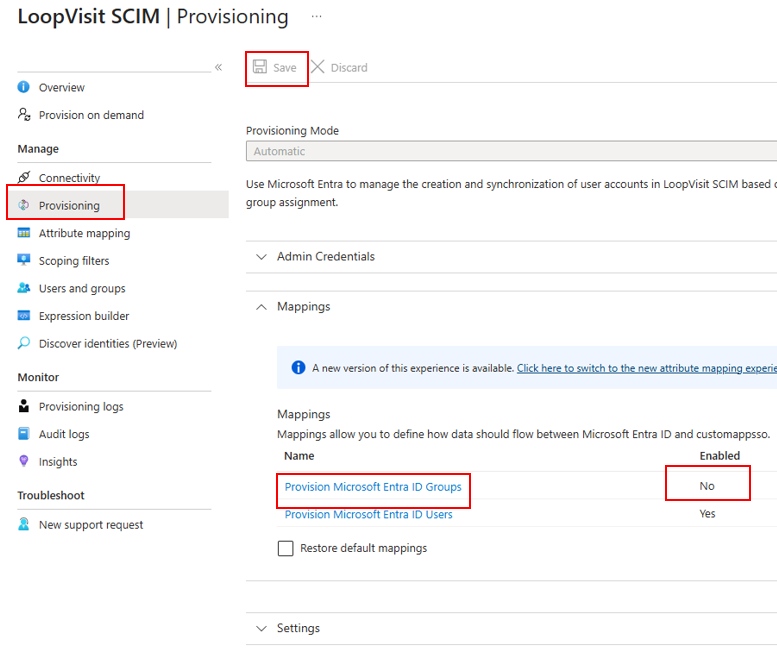
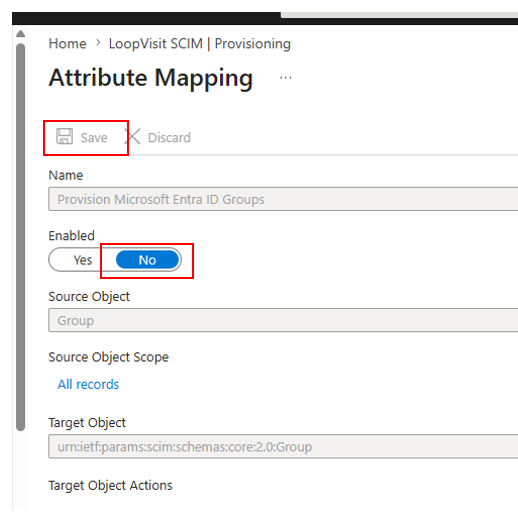
Select “Mappings” and set under provisioning “Provision Microsoft Entra ID Groups to No”
(Click the blue field, and set “groups” to “Enabled No”) and Save.
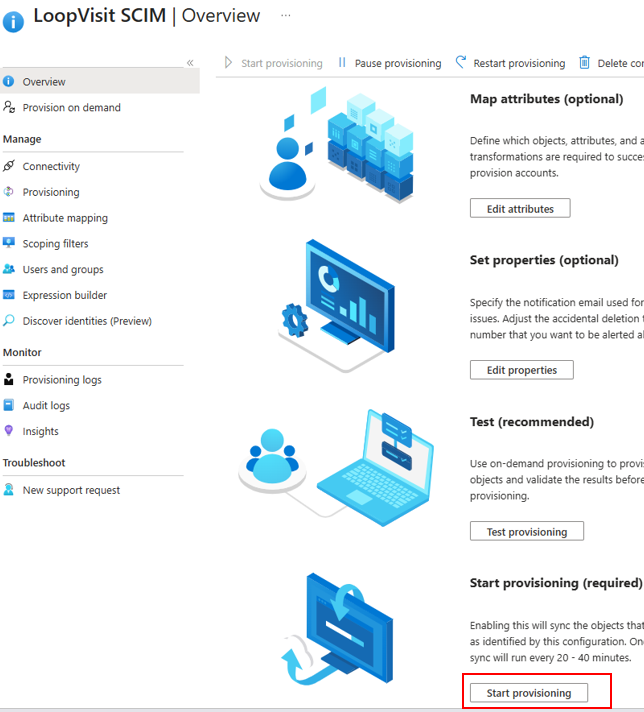
Go to Overview menu, and select “Start provisioning”
In a about 40-60 minutes the users should start to appear in LoopVisit.
Check the provisioning logs in Entra ID for information.
You can also test it by useing the “Provision on demand” function in the Enterprise App.
