Optionally select menu item “Users” if you would like to add additional users to your portal by inviting them to join. Under menu item “Partners” You can also add your preferred Partners. When a partner is added they will have access to your configuration console.
There is also an option to add Microsoft Entra-ID (Azure AD) as login to your console. Please refer to support pages for instructions on how to enable this option.
2. Prerequisites
Please make sure you have followed the steps described in support section to make your calendar service ready. Microsoft 365, Google Workspace, and LoopBooking environments all need preparation for the configuration console to be able to connect. So make sure the steps for the different environments are done and server settings is configured before proceeding with the configuration.
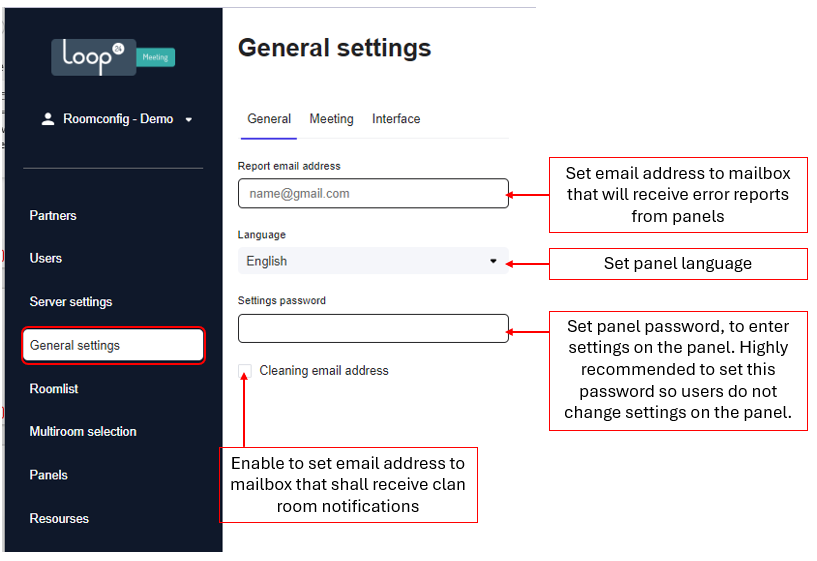
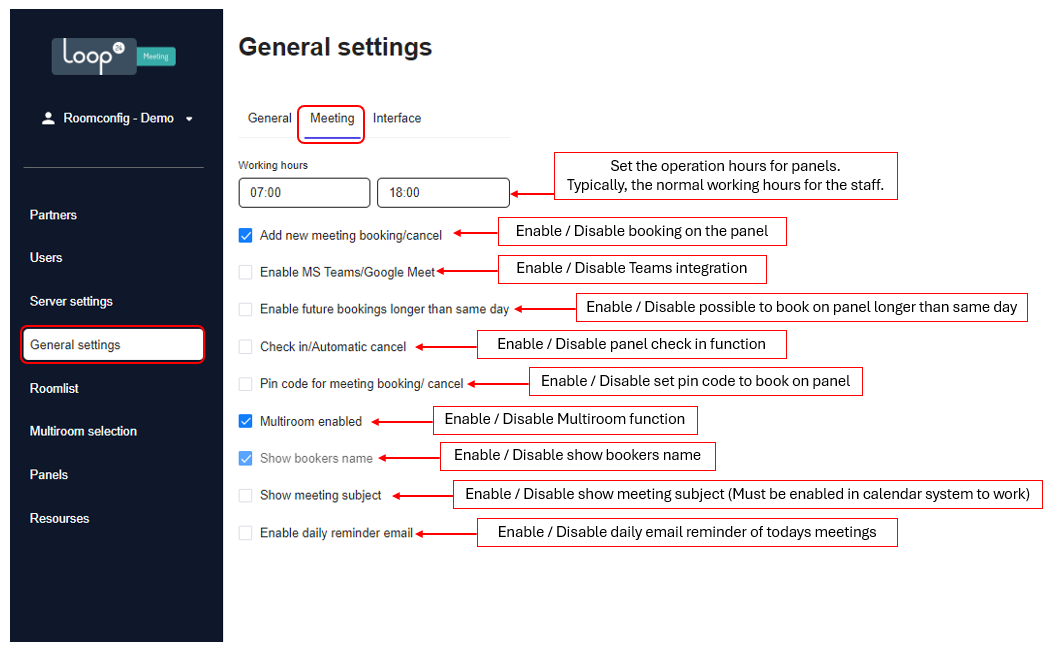
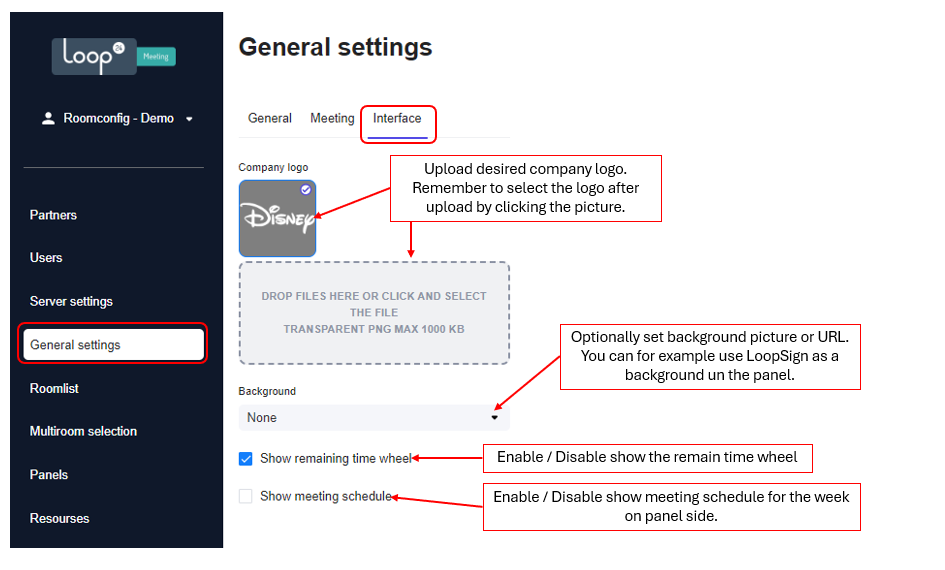
3. Set general settings
After server settings is configured and connection to calendar system is confirmed, the next step is to set default settings for all your panels. These settings can also be set individually for each roomlist and individual room. We recommend first setting the general settings before customizing for roomlists and rooms. Select General settings in the side menu. Remember to click “Submit” when desired settings are set.
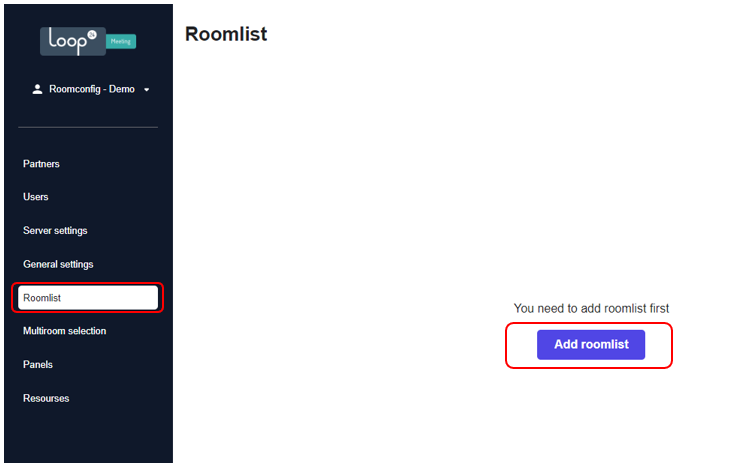
4. Adding roomlists
After server settings is configured and connection to your calendar system is confirmed, the next step is to add rooms to your environment. Select menu item “Roomlists” and select “Add roomlist”
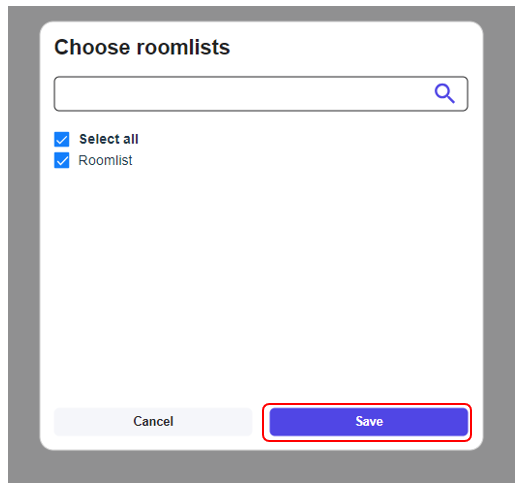
Select the roomlists you like to import into Roomconfig. Typically, the roomlists that contain the rooms where you are going to use meetingroom panels. Don’t worry, you can easily add roomlists at a later stage as well.
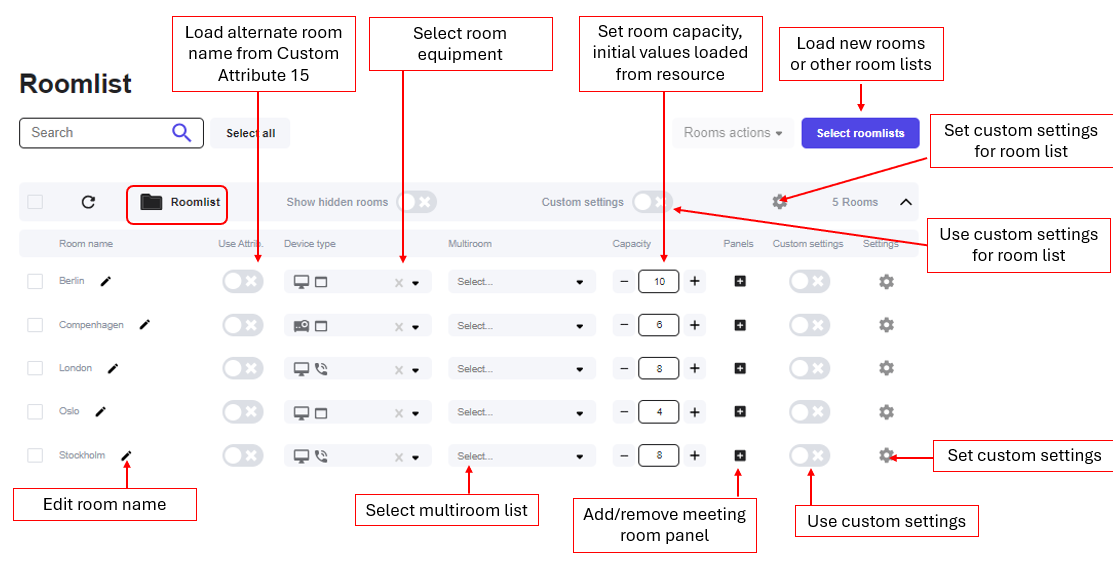
Click the roomlist and set the desired settings for the rooms
5. Configure Multiroom
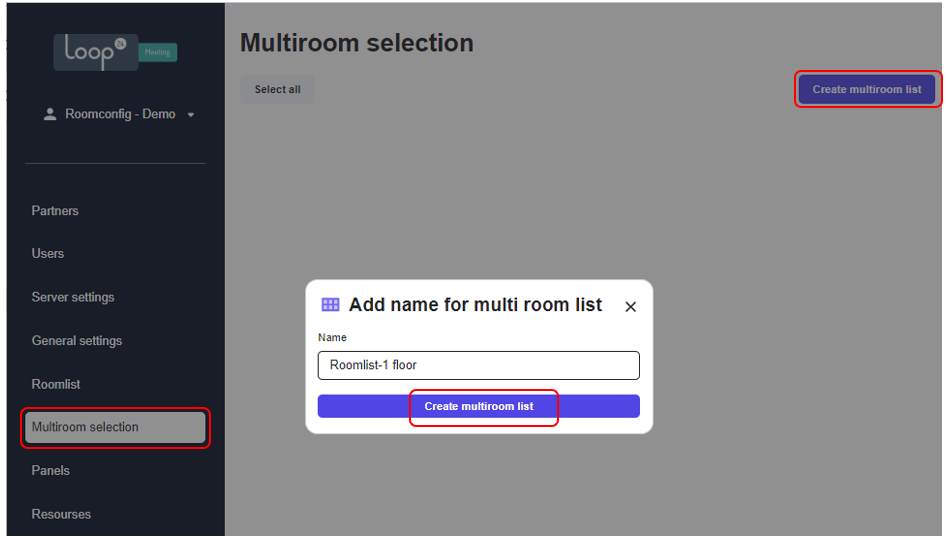
With “Multiroom” you can book other rooms on the meetingroom panel. Configure different Multiroom lists according to what other rooms should be possible to book from each panel. Select menu item “Multiroom selection” and the “Create multiroom list”. Give it a name and select “Create multiroom list”.
When the list is created, click the “pencil” to edit the Multiroom list. Select the rooms you like to include in the list and click “Edit multiroom”
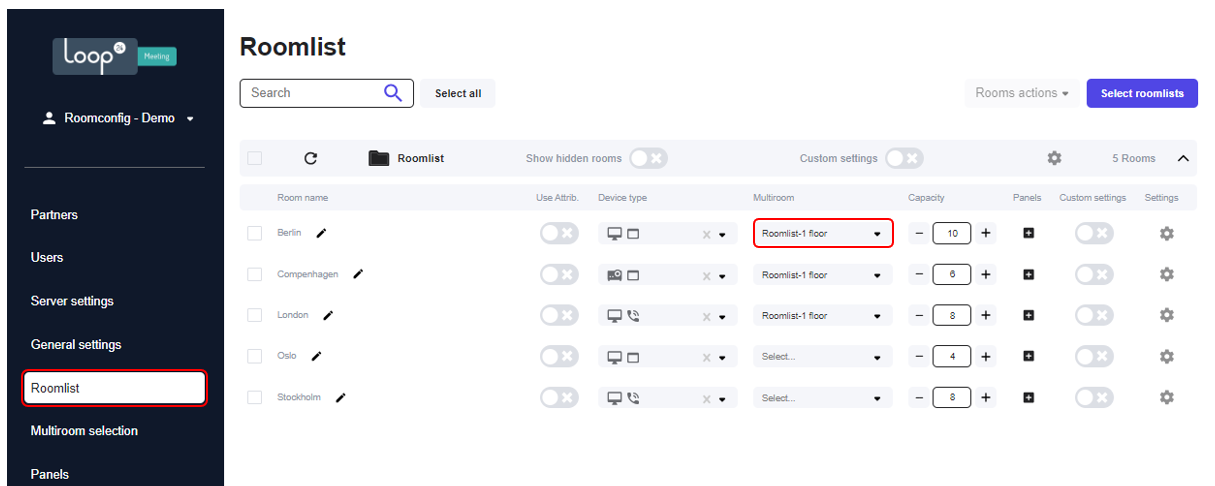
To apply a Multiroom list to a room, go back to menu item “Roomlist” and select the desired multiroom list in the dropdown menu. Repeat this for each room you like to apply the multiroom list.
6. Adding meetingroom panels
Select “Panels” from the left menu. The first thing you need to do is to “Enroll” your panels into the portal. Only panels with software versions 3.x.x and above will have the option to be enrolled. So please make sure your panel has the latest version installed.
If you are migrating panels from legacy portal, you first need to reset server settings on the panel. Please refer to our FAQ on how to proceed.
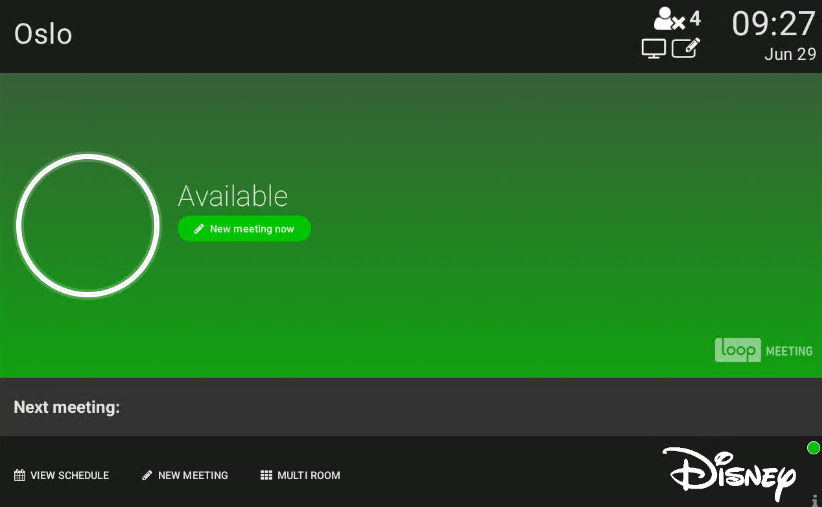
The meetingroom panel will look like this when started up for the first time or after a server reset. First click the “Update Application” to make sure you have latest app version. To enroll the panel you don’t need to do anything on the panel itself, just make note of the “HASH” code.
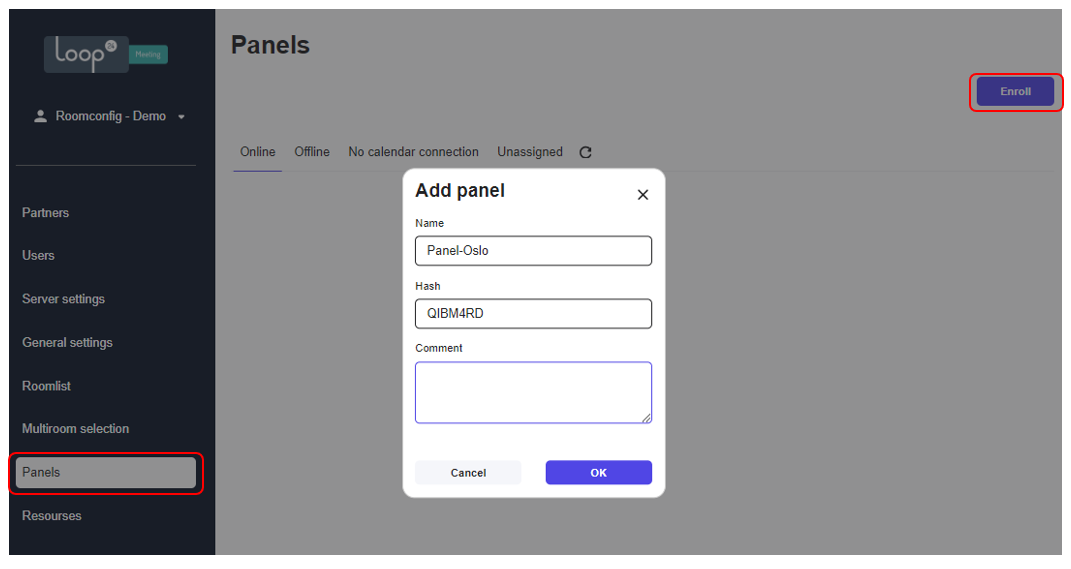
To enroll the panel into your configuration console, Select “Panels” the click the “Enroll” button. Give the panel a name, choose a name so you will know where the panel is mounted. This way it will be easier when you are to assign it to a room.
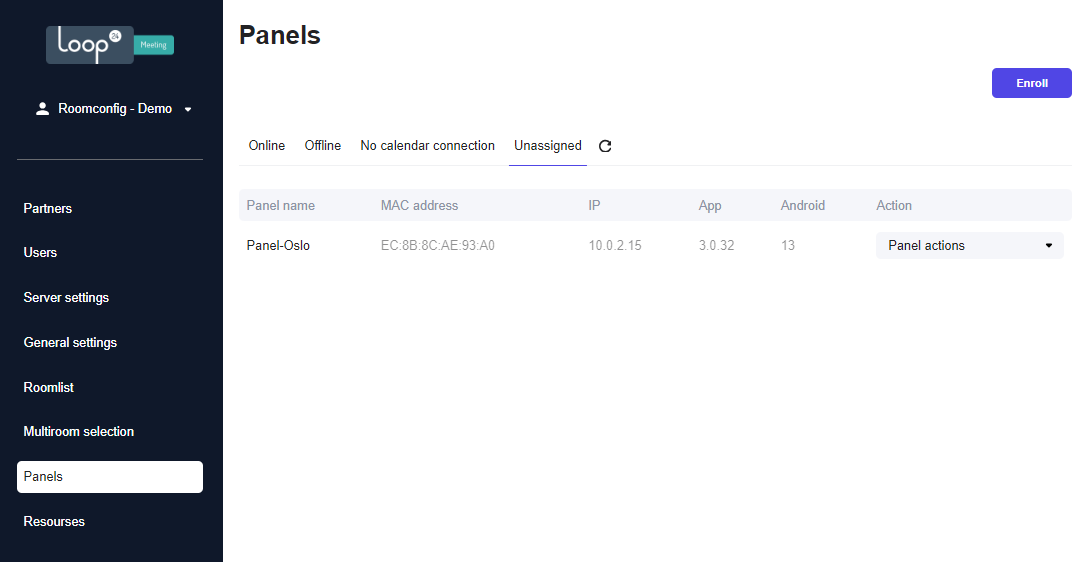
After the panel is enrolled, it will appear in the “Unassigned” section. If it does not show the details for your panel (MAC, IP, App and Android version) First try “Refresh” the webpage. If it still does not appear it most lightly do not have internet connection, a firewall could be interfering with connection, or it is missing license.
Repeat this procedure to enroll all your panels to the configuration portal.
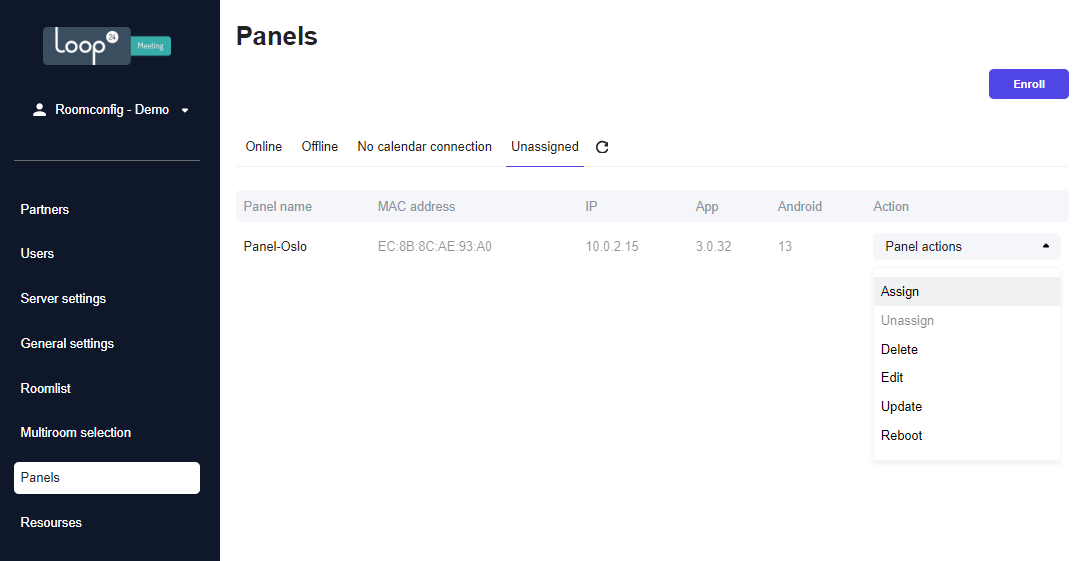
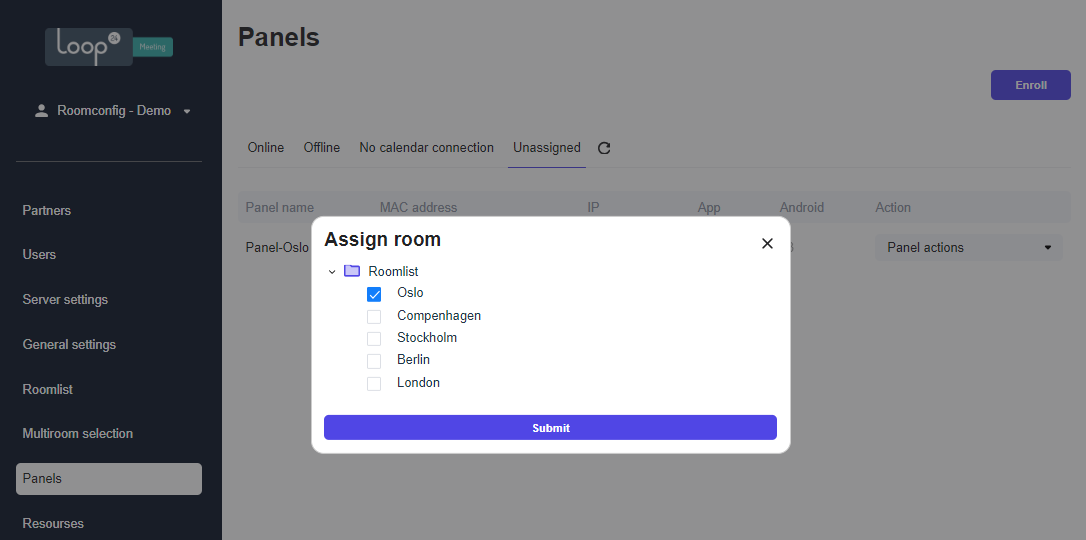
To assign a panel to a room, select “Panel Actions” and “Assign” then select the room you like to assign the panel to. The assignment of a panel can also be done from the roomlist overview.
When you have assigned a panel to a room the panel will connect to the room and use the configuration set in your configuration console.