LoopVisit MS365 integration
Here you will find information on how to configure MS365 integration in LoopVisit
Back

Integration with MS365 can be done in two different ways, all to align with your company security policies.
1. Integrate using a predefined Entra ID enterprise app.
- Log into LoopVisit console with your admin account. https://visit.loopvisit.com
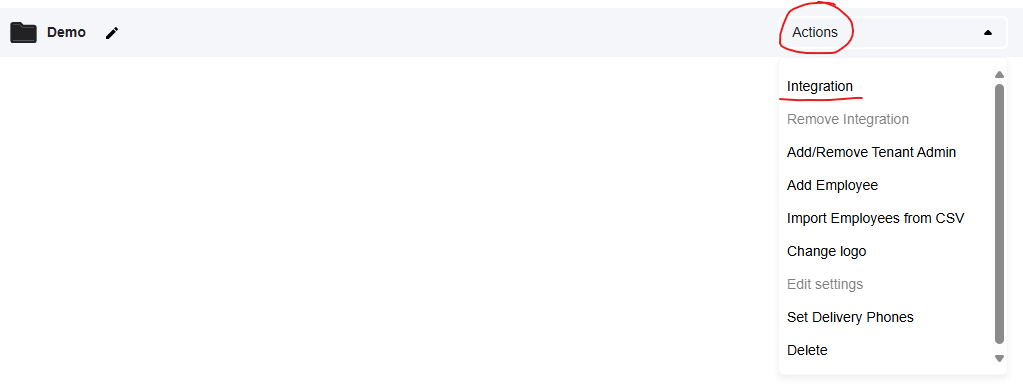
- Under “Actions”, select “Integrations”
- Enter the Entra group ID to the user group that contains your employees.
P.S – Only employees with registered phone number will be syncronized.
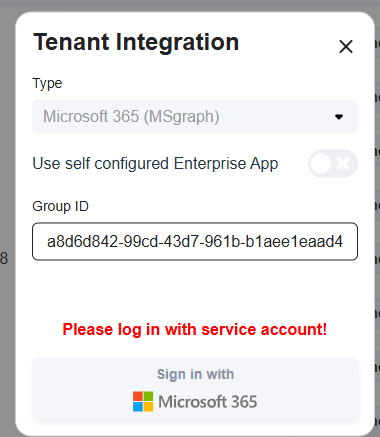
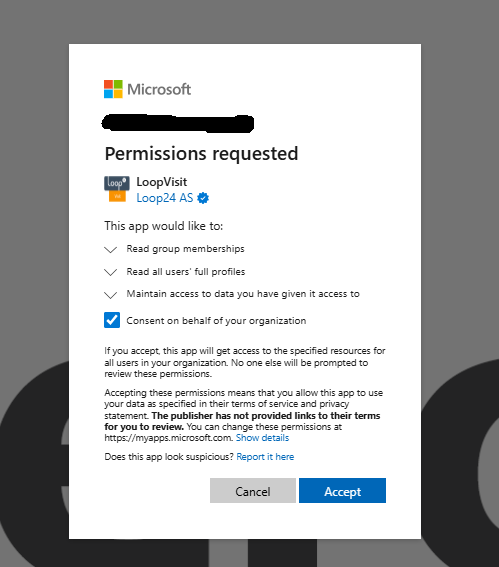
- Log in with a “Global admin account” to register and approve the integration
Recomended:
If you at a later stage like to remove the Global admin account to be the integration account, select “Actions” and “Remove integration” then repeat the process and log in with a dedicated service account.
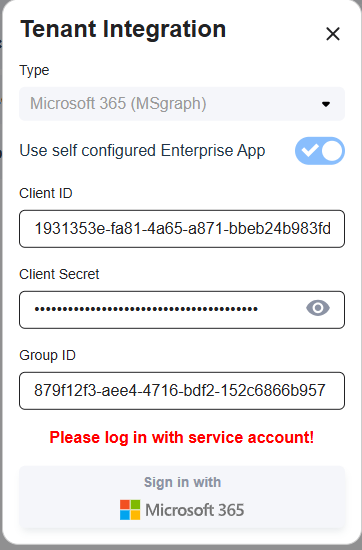
2. Integrate using self-registered Entra ID enterprise app.
Create the Entra ID app registration
- Go to Entra ID app registration (Make sure you are logged in as “Global Admin”
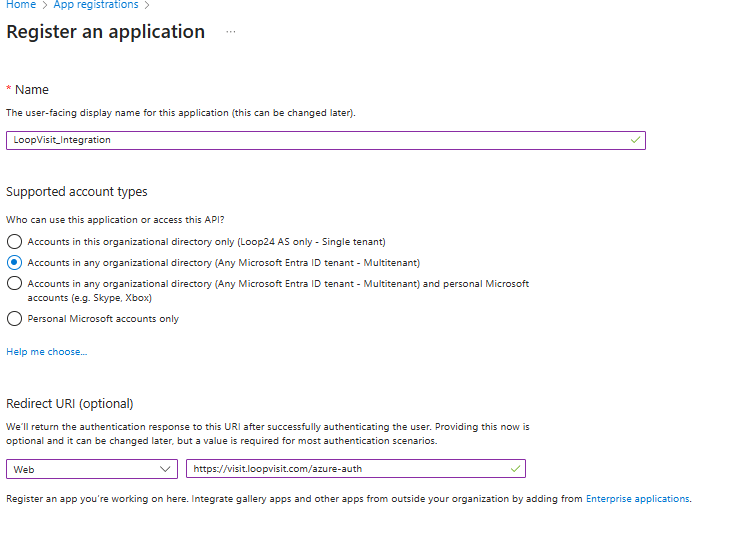
Entra ID App registration - Select “New registration”
- Give the App a name, for example “LoopVisit_Integration”
- Select “Accounts in any organizational directory”
- Enter redirect URI’s Web
- https://visit.loopvisit.com/azure-auth
- Select “Register”
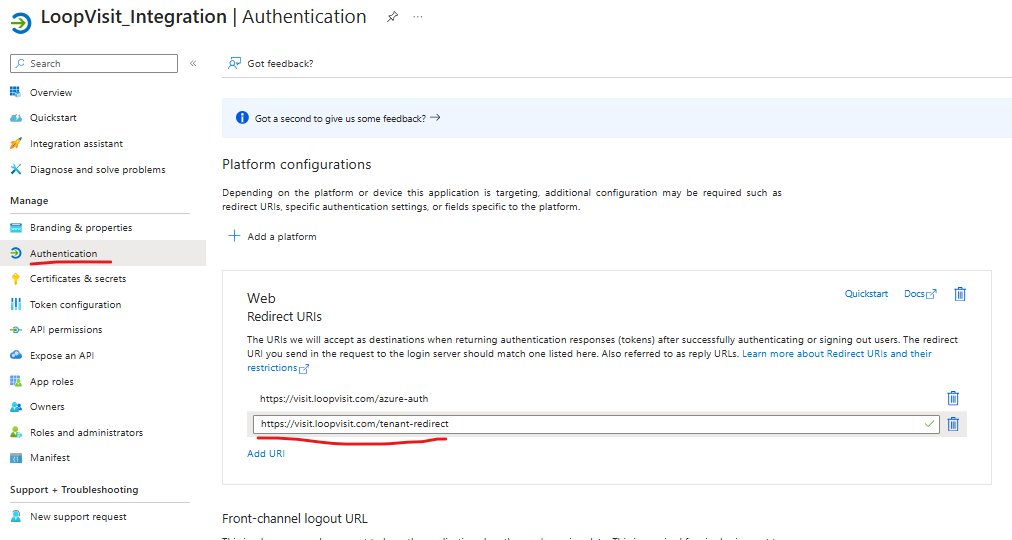
- Select menuitem “Authentication” and add another Web redirect URI
- https://visit.loopvisit.com/tenant-redirect
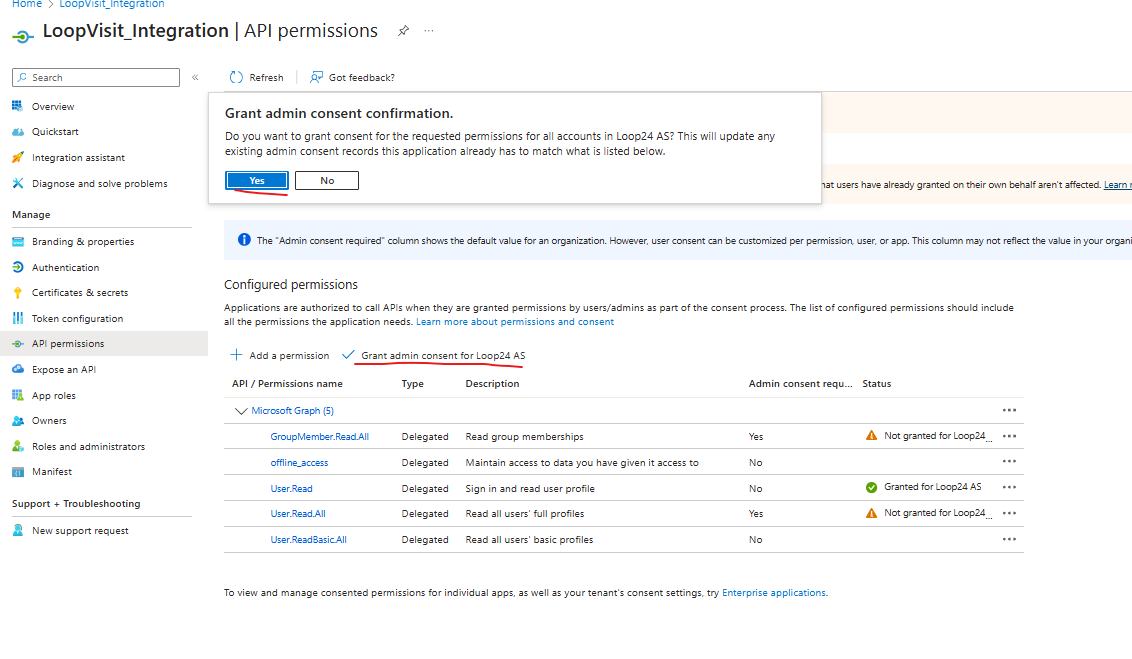
- Select menuitem “API permission”
- Add the following Microsoft Graph delegated permissions
- GroupMember.Read.All
- offline_access
- user.read.all
- user.readbasic.all
- Grant admin consent
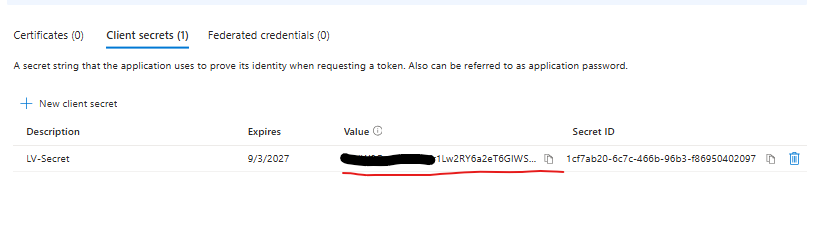
- Select menuitem “Certificates & secrets”
- Select “New client secret”
- Give the secret a description, for example “LV-Secret”
- Select desired expiery (Recomended 24 months)
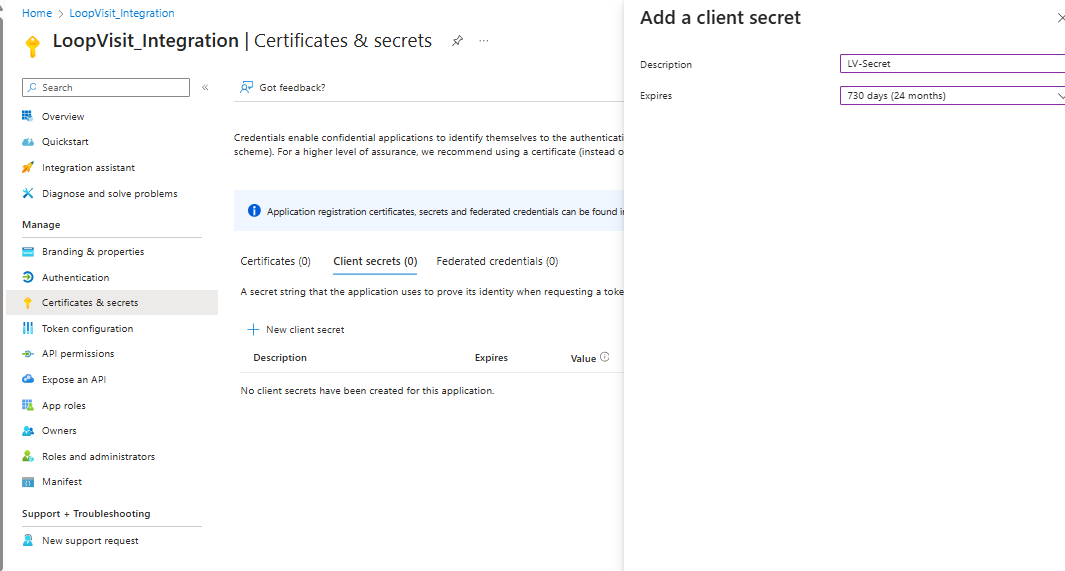
- Copy the secret value to Notepad, (you will not be able to see it again, and yhis is needed later in this process)
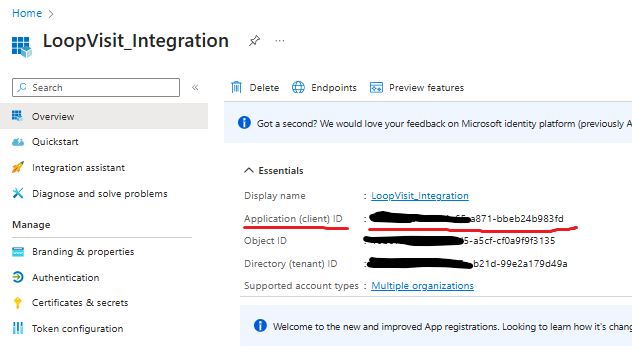
- Select menuitem “Overview” and make a note of the following value.
- Application (client) ID = Client ID
- Go to LoopVisit administration console, and select “Actions” and “Integration”
- Fill in the values needed and log in with “Global Admin”