
Configure Teams integration in LoopBooking
1. Configure Entra ID Enterprise App
- Log into your Entra ID / Azure AD configuration page (Make sure you log in as a Global Admin)
https://portal.azure.com/#view/Microsoft_AAD_IAM/ActiveDirectoryMenuBlade/~/Overview - Select Enterprise applications in the left menu
- Select New application in the top menu
- Select Create your own application for top menu and give it a name (For example LB-Teams)
- Select “Register an application to integrate with Azure AD”
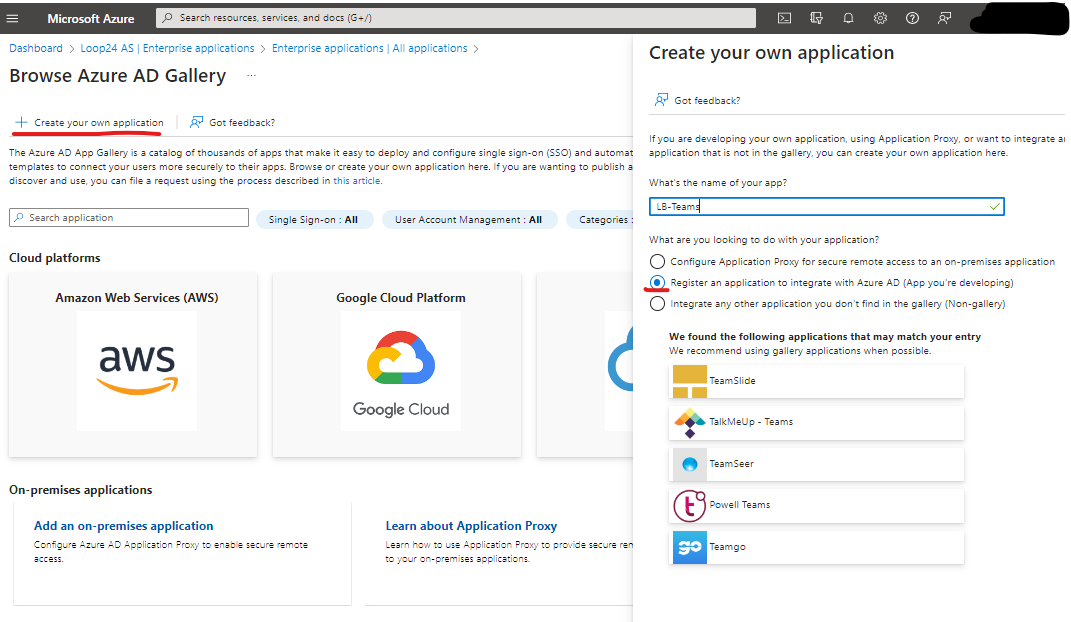
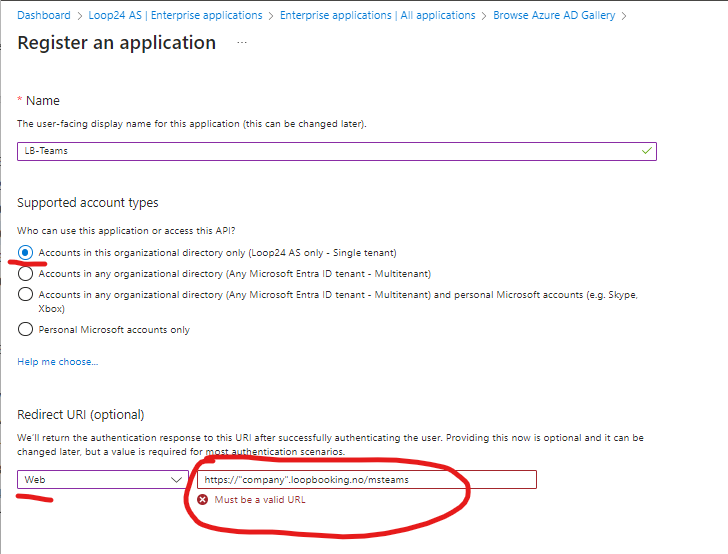
- Select “Accounts in this organizational directory only”
- Under Redirect URI, select Web and enter the redirect URI https://your_domain/msteams
Example: https://company.loopbooking.no/msteams then click register.
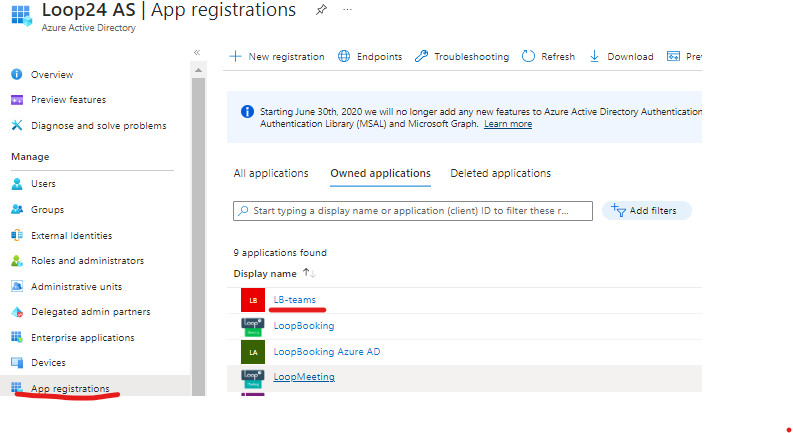
- Find and select your Application under “Application Registrations”
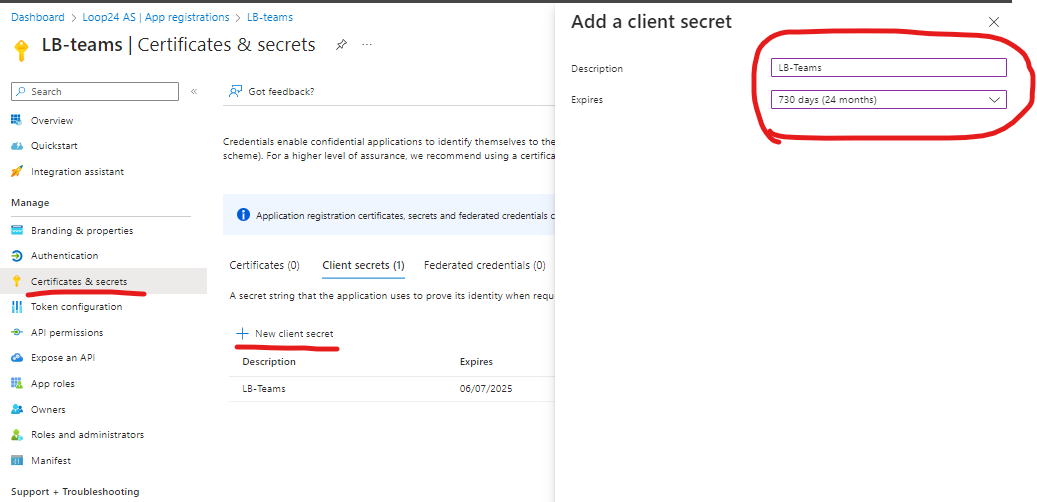
- Create a secret key for your application on the «Certificates & Secrets» page. Make a note of the value of the secret key!
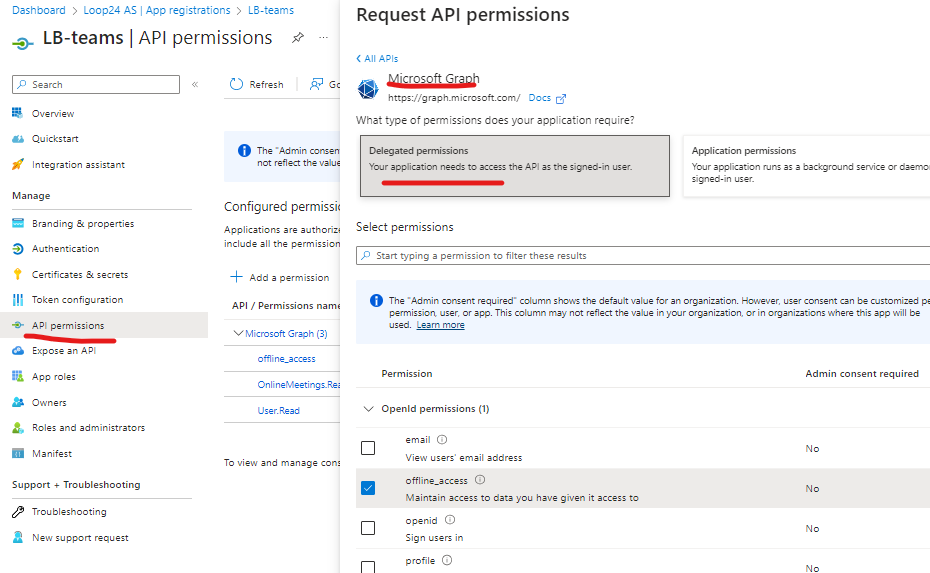
- Select API pemissions and add MSgraph permissions as Delegated permissions.
- offline_access
- OnlineMeetings.ReadWrite.
Now open your LoopBooking portal, make sure you are loggen in as Admin.
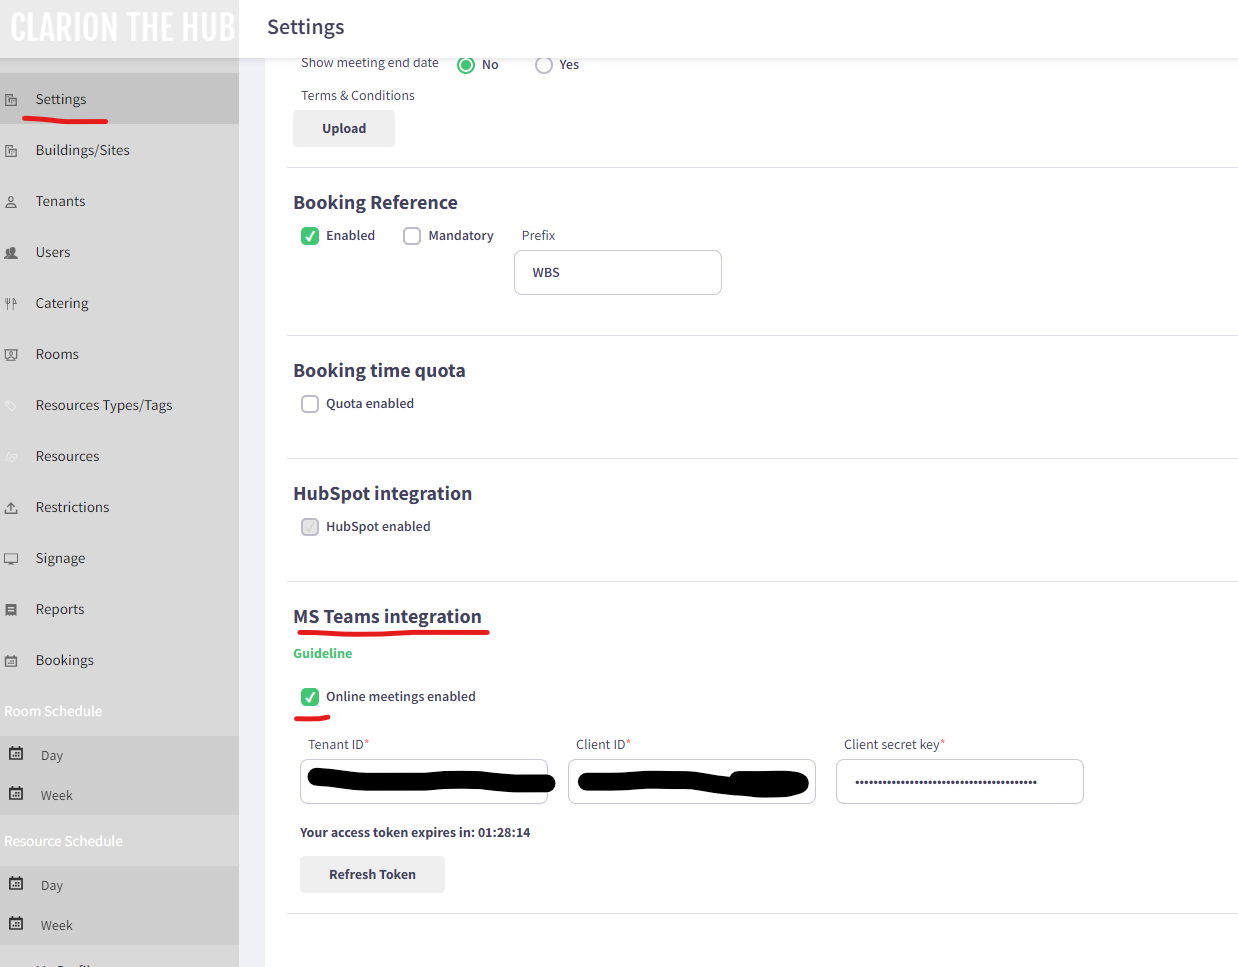
In the settings on LoopBooking insert the following data into the fields:
-
- Tenant ID — this is the identifier for the Azure Active Directory (AD) tenant that a user application is registered under.
- Client ID — the application ID that the Azure app registration portal assigned when a user registered its app.
- Client Secret key (Value) — the client secret that a user generated for its app in the app registration portal.
- Click the «Save» button.
- After the page is saved the «Integrate» button will be enabled.
- Click the «Integrate» button to start the integration process. You will be prompted to sign in into your Azure account (if your are logged out) and provide permissions.
- Once the integration process is completed, the «Integrate» button will be replaced with a «Refresh Token» button and an access token expiration time will be displayed. You will be able to refresh token by clicking the «Refresh Token» button.
- If the «Online meetings enabled» checkbox is activated, an access token exists and is not expired, an «Online meeting» checkbox will appear on the booking page. To create an online meeting for a booking, activate the checkbox before saving the booking. After the booking is saved the online meeting info will appear on the page.
2. Configure MS365 calendar auto processing options
If you have MTR equipment in your MS365 rooms and like to enable the “Join” function for your meetings, you need to check/change the calendar auto processing settings.
Please note: If you have MTR equipment you will also need a MS365 sync subscription for LoopBooking, please contact Loop24 for further information
– Run a powershell prompt in “admin” mode
– Login as global admin to your MS365 tenant in powershell
Command:
Connect-ExchangeOnline -UserPrincipalName user@domain.com
Make sure to set calendar processing “Delete comments” to false.
(This makes sure you get all necessary information synchronized to your MS365 room and MTR equipment is able to use the “join” function)
Command:
Set-CalendarProcessing -Identity “meetingroom name” -DeleteComments $false
