LoopMeeting version 2.0.0 and above supports LoopSign as background theme. This gives you endless opportunities to customize your background theme. Promote your products, set the Logo for the important VIP guests, internal information, an in general make the meeting room panels more alive.
In addition to your LoopMeeting panel you will need a special LoopMeeting bundle subscription for LoopSign
2.How to set up LoopSign
In LoopSign you need to:
Create a new screen
Select landscape or portrait (Depending on the orientation of your LoopMeeting panel)
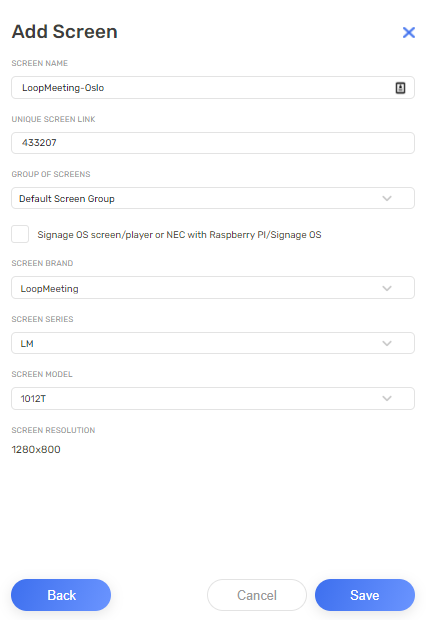
Create Screen without template
Give the screen an name (Example the same as the meeting room)
Screen Brand, select LoopMeeting
Screen Series, select LM
Screen Model, select your LM model (Example LM1012T)
Press save
Click on the screen you have created to add content. (Note. only a few widgets is available for LoopMeeting)
After edit, save the screen and make a note of the URL to the screen.
3. How to configure LoopMeeting with LoopSign URL (Central config)
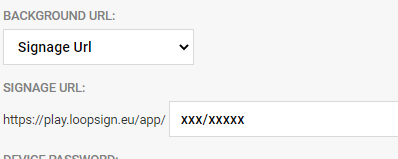
Find the “Background URL” option and select Signage URL”
Enter the URL to your screen
Make sure to press the “Save” icon in the bottom of the page
The change will be visible on the panel the following day. To check it immediately, go one of your panels and reload the settings.
If you like to have different signage backgrounds on your individual panels, the settings can be set on each panel in the General Settings override menu.
Now your signage will run as a background
4. How to configure LoopMeeting with LoopSign URL (Local config)
Enter LoopMeeting settings
Select Advanced Settings
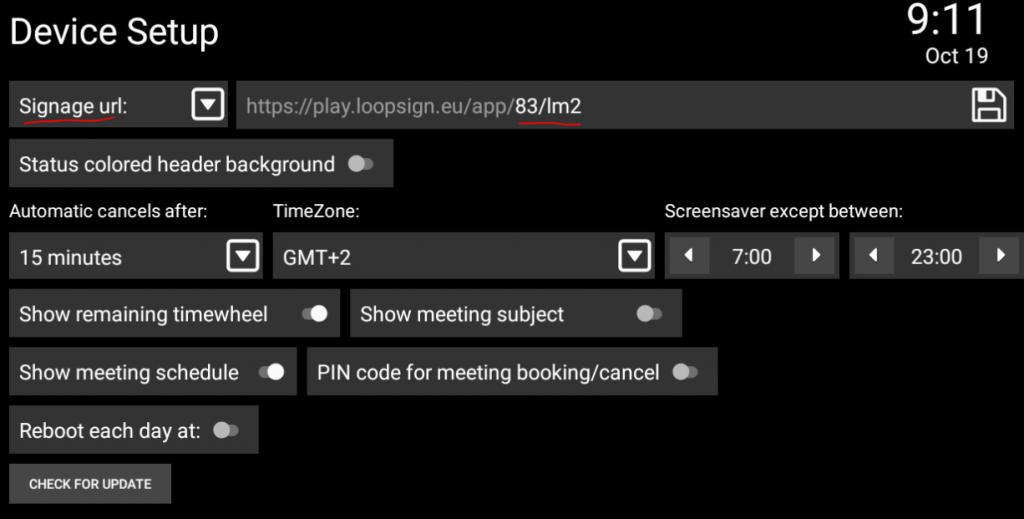
Select “Signage URL” in the top left dropdown
Enter the URL to your screen
Make sure to press the “Save” icon on the right side
Select if you want to have the header of the screen with color (Red, Green, Yellow – depending on room status)
Go back to “Settings”
Now restart the Application, either by power off/on or drag your finger from the bottom and press the “Square” and press the exit. Then start the app again.