LoopMeeting is an Android application bundled with different Android based touch screen configurations. LoopMeeting communicates directly to the LoopBooking environment useing HTTPS interface protocol with TLS 1.2 Encryption.
2. Prerequisites
The LoopMeeting application needs a separate service account that has “Building Admin” rights to the LoopBooking environment. Make sure you have your LoopBooking environment ready and can log in as Building Admin.
2.1 Communication Protocols
For LoopMeeting to work it needs HTTPS (port 443) communication to the LoopBooking environment.
The Android panel also needs to synchronize time and date with an NTP server. The Android OS is by default set to synchronize towards a Google NTP server, so NTP (port 123) must be open towards internet to make sure time and date are correct. The panels can also be configured to synchronize towards a specific NTP server.
3. Create Service Account
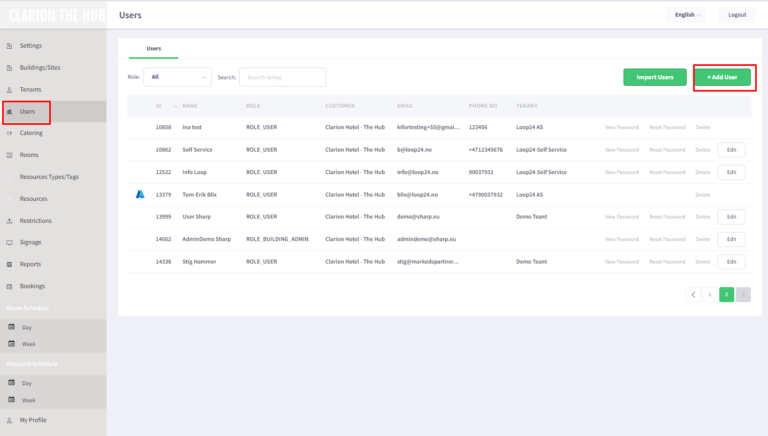
Log into you LoopBooking environment as a “Admin”. Go to “Users” and select “Add User”
Select “Active users” and click “Add a user”
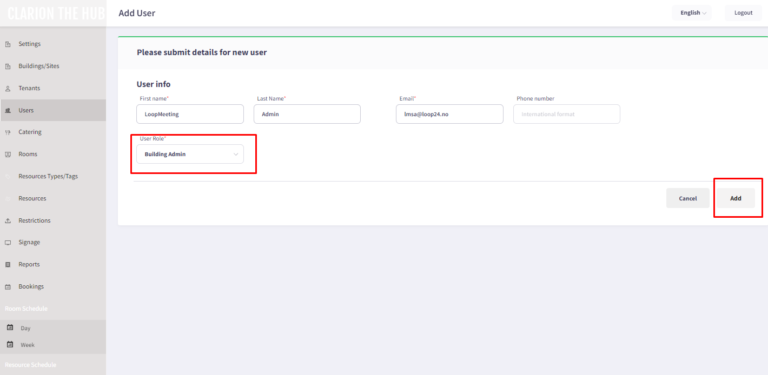
Create a new user that will be the “Service account” User can be created with a “fictional” email address. For example lm@”yourdomain.com”
Make sure to select user Role “Building Admin”
Click “Add” to create the user
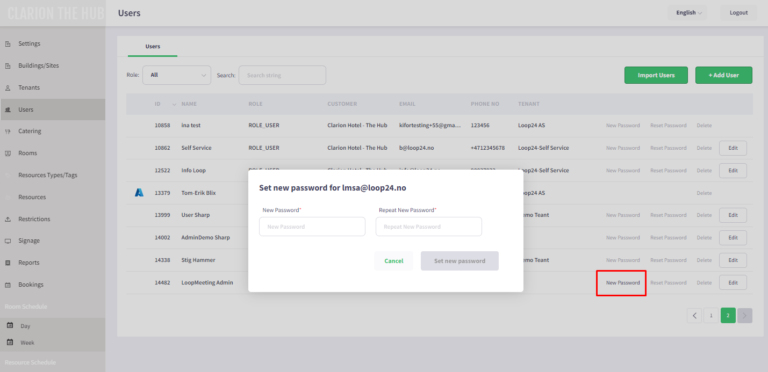
After user is created you need to set the password for the account. In the user section, find the account you created and select “New Password” Set the password you like to use and press “Set new password” button.
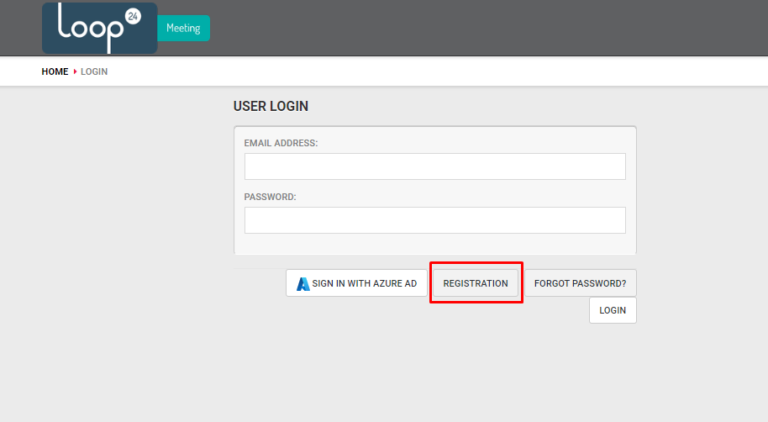
If you did not already create an account, select “Registration” Create/log into your account.
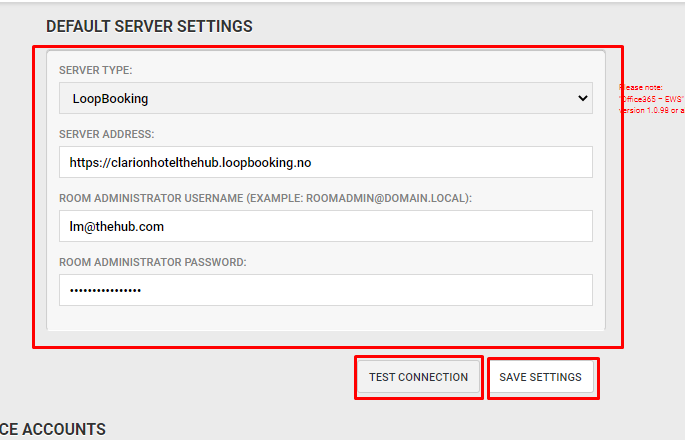
In Server Settings do as follows: – Select Server type: LoopBooking – Server Address: URL to your LoopBooking environment. – Room Administrator Username: user (mail address) to the service account you created earlier.1 – Room Administrator Password: Password to the service account you created earlier.
Click “Test Connection” if Connection Successful, click “Save Settings”